Difference between revisions of "Script:Random Dungeon Generator"
From Roll20 Wiki
Stephen S. (Talk | contribs) m (→Using the the Random Dungeon Generator) |
Stephen S. (Talk | contribs) m |
||
| Line 69: | Line 69: | ||
:[[file: Successfully_Randomly_Generated_Map.jpeg]]<br /> | :[[file: Successfully_Randomly_Generated_Map.jpeg]]<br /> | ||
<br /> | <br /> | ||
| − | * Click | + | * Click "Add-Dynamic-Lighting-Paths" macro. |
** Make sure you are on the "Dynamic Lighting" layer. | ** Make sure you are on the "Dynamic Lighting" layer. | ||
** If the code successfully runs you will see paths drawn on each wall. | ** If the code successfully runs you will see paths drawn on each wall. | ||
| Line 75: | Line 75: | ||
[[File:Successfully Randomly Generated Map With Paths.png]] | [[File:Successfully Randomly Generated Map With Paths.png]] | ||
<br /> | <br /> | ||
| + | ==Modify the Map Before Adding Paths == | ||
| + | * Prior to adding the paths by clicking "Add-Dynamic-Lighting-Paths" macro, the map can be altered. | ||
| + | * While on the "Map & Background" layer, right click to use the native "multi-sided" Roll20 feature, to swap out any tile. | ||
| + | * For a selected tile, use the "token actions" to change the rotation of a tile, or use the native Roll20 rotation arm.<br /><br /> | ||
| + | {{mbox | text='''KNOWN BUG''', Due to a known firebase issue the API will crash if the "token action"s are used. Simply, save and restart the API and the script "token action" rotation macros will work for the current map.}}<br /> | ||
| + | * Once you are happy with the map click the "Add-Dynamic-Lighting-Paths" macro. | ||
| + | |||
Revision as of 13:51, 23 February 2014
Contents |
Use of Geomorphic Map Tiles
- This API script uses geomorphic map tiles. The set used for this script can be located on the Roll20 Market place: Old School Geomorphic
- Geomorphic map tiles are a design technique that defines and locates set features on edge of the tile so any tile can connect to any other tile without concern for orientation.
- These can be downloaded and modified however you choose, so long as it is for personal/private use, and is consistent with Terms of Service and Privacy Policy.
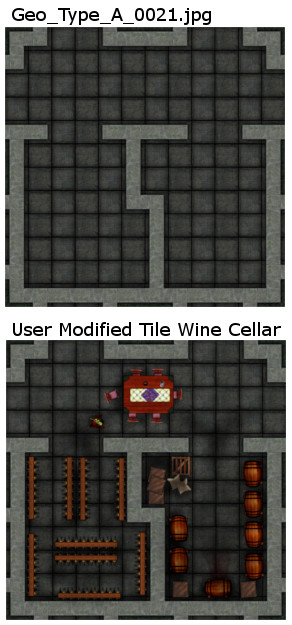
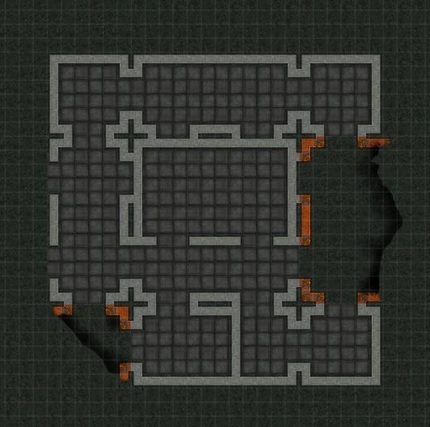
- To the right, there is an example of a modified geomorphic map tile. It is important to note the modification to the tile do not included modifications to the walls (Dynamic Lighting path information will have to be added to the code for any new wall patterns.)
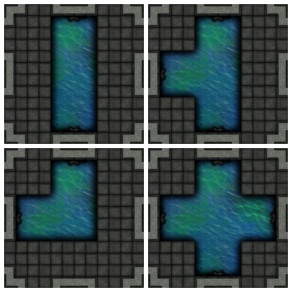
- Naming of the tiles is an important factor due to the use of names in the code. Unmodified tiles in the Old School Geomorphic set includes "Geo_Type_A_0001" through "Geo_Type_A_0045." It is recommended user modified tiles be named consistent with that to keep any code modifications required consistent as well.
- New tiles can be created for this set by the user and more information on that can be found at Geomorphic Map Tiles. However, Dynamic Lighting path information will have to be added to the code for any new wall patterns.
- Geomorphic map tiles are a design technique that defines and locates set features on edge of the tile so any tile can connect to any other tile without concern for orientation.
- The Old School Geomorphic tiles are arbitrarily referred to as "Type_A" so if other content creators create tiles we will know which set are designed to work with other sets. The only features that would be critical would be the "off map" areas and the shadow drops for the walls. You can get the off map texture and shadow drop sample to make it easier below:
- https://wiki.roll20.net/File:Geo_Type_A_Shadows_Example.png
- https://wiki.roll20.net/File:Geo_Type_A_Off_Map.jpeg
- Both can be used to create and sell additional "Type_A" geomorphic map tiles.
Use of Rollable Tables
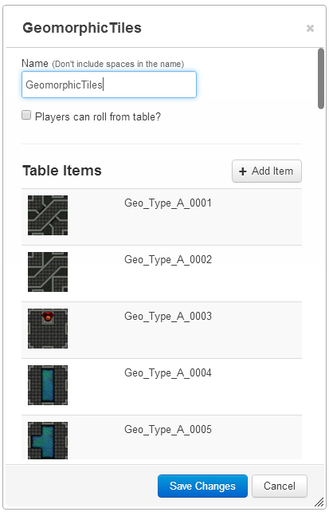
- The most challenging part is setting up the roll able table. It must be named "GeomorphicTiles" and if should only include "Geo_Type_A_0001" through "Geo_Type_A_0045" with the unmodified API code.
- Most often errors with the implementation of this script is due to errors with setting up this table.
- This is used to save users from hard coding URLs and to leverage the "choose side" feature native to Roll20.
- If you plan to modify the code by adding or removing tiles this roll able table items and names must be in parity with the "geomorphicTilesInformation" array which looks like this in the code (sample of some of the lines of code:)
var geomorphicTilesInformation =
{tileName: "Geo_Type_A_0001", edge: false, corner: false, entrance: false, type: "d", rotation: 0},
{tileName: "Geo_Type_A_0002", edge: false, corner: false, entrance: false, type: "d", rotation: 0},
- This array provides information to the API needed to properly place the tile.
- The Rollable Table must be in parity with the "dynamicLightingArray" array which looks like this (sample of some of the lines of code:)
var dynamicLightingArray = [
{tileName: "Geo_Type_A_0001", path: [[0,105],[105,105],[105,0]]},
{tileName: "Geo_Type_A_0001", path: [[525,0],[525,35],[735, 35],[735,0]]},
- This array contains the path points that define the locations of walls. Tiles with identical walls can have the same points, however each tile needs points associated with it's own name. For example "Geo_Type_A_0004" through "Geo_Type_A_0007" have the same walls but have different map features.
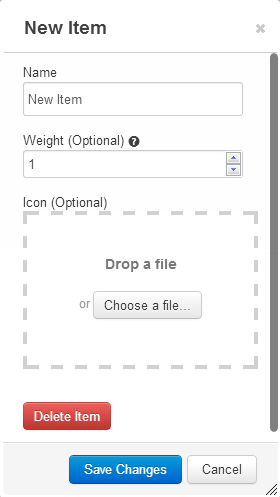
- The script uses the item weight to determine the probability of a tile being selected or to turn off a tile. The Item Weight for each tile must be set. It can be set to any number between 0 and 100. A value of 0 turns off the tile. All tiles have a equal chance of being initially selected, once selected the tile is checked against its rarity. If the rarity check fails a new tile is selected and the process repeats. Adjacent tiles of like type (more information below) will affect the rarity of a new tile placement.
Setting Up the Map
- Without modification, the script will be attempting to add map layer tiles to a map named "GeomorphicMap."
- There should be one and only one map named "GeomorphicMap."
- The player book mark DOES NOT have to be on it.
- Set the map width to 36 or any higher multiple of 12 (36, 48, 60, 72, 84, etc. Something reasonable.)
- Set the map height to 36 or any higher multiple of 12 (36, 48, 60, 72, 84, etc. The map does not have to be "square," a map 36 by 72 works just fine.)
- Once finished with the map you can create a copy or use the use the Transmogrifier to get the finished map in a active player campaign.
Finishing Setup
- Check over things and enter the API command "!setup"
- This will create five macros:
- Turn-180-Degrees
- Turn-Left-90-Degrees
- Turn-Right-90-Degrees
- Add-Dynamic-Lighting-Paths
- Create-Map-Layer
- Check "in Bar" for "Create-Map-Layer" and "Add-Dynamic-Lighting-Paths" and sort them in you macro bar with "Create-Map-Layer" being first.
- The other macros are token actions and should not be in the macro bar.
- This will create five macros:
Using the the Random Dungeon Generator
- Make sure there are no images on any of the layers of the map. If you are having trouble clearing the map, simply delete the map and create a new map following the information in the Setting Up the Map section.
- Click "Create-Map-Layer." The API will check for a number of things before creating the map:
- "GeomorphicMap is missing."
- "More than one GeomorphicMap."
- "GeomorphicMap has images on it."
- "GeomorphicMap has paths on it on the Dynamic Lighting layer."
- "Map height must be disible by 12."
- "Map height must be 36 or larger."
- If the code successfully runs you will see an randomly generated map.
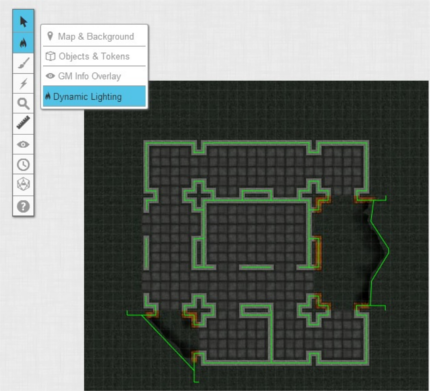
- Click "Add-Dynamic-Lighting-Paths" macro.
- Make sure you are on the "Dynamic Lighting" layer.
- If the code successfully runs you will see paths drawn on each wall.
Modify the Map Before Adding Paths
- Prior to adding the paths by clicking "Add-Dynamic-Lighting-Paths" macro, the map can be altered.
- While on the "Map & Background" layer, right click to use the native "multi-sided" Roll20 feature, to swap out any tile.
- For a selected tile, use the "token actions" to change the rotation of a tile, or use the native Roll20 rotation arm.
| KNOWN BUG, Due to a known firebase issue the API will crash if the "token action"s are used. Simply, save and restart the API and the script "token action" rotation macros will work for the current map. |
- Once you are happy with the map click the "Add-Dynamic-Lighting-Paths" macro.
Acknowledgement: Big thanks to Alex L. for his effort to write the code that works out all the math needed to rotate and place the Dynamic Lighting paths.


