Difference between revisions of "Macros"
From Roll20 Wiki
(→Video Example) |
m (→Video tutorial on using Abilities) |
||
| Line 46: | Line 46: | ||
=== Video tutorial on using Abilities === | === Video tutorial on using Abilities === | ||
| − | + | <br>A very basic look at using abilities for more simple rolls. (ex. Will Save, Skill Checks, etc.) | |
<br>[http://youtu.be/gIOsFeCsY0k Attributes & Abilities] | <br>[http://youtu.be/gIOsFeCsY0k Attributes & Abilities] | ||
Revision as of 11:39, 1 May 2013
Macros are user-defined shortcuts to commands you regularly want to repeat. For example, you can create a macro that shouts a battlecry then performs an attack that you frequently use. Instead of needing to type all of the commands over and over again as you play, you can just type one short command instead.
Contents |
Creating and Editing Macros
Go to the My Settings tab (housed under the small gear image) in the Sidebar. To enter a macro, first type what you want to call the command. Example: "test". Then to the right, put in the command. This could be typed text, a roll, or emote. Press "Enter" after this information to save the command.
To use the macro, type # and the command (e.g. #test) and press enter. There is also a tab auto-complete function for macros.
Multiple commands
One of the strengths of the macro system is it's ability to execute multiple actions with a single command. To do this, simply put each item on it's own line, and they will be executed in order when you run the macro.
Example
If I want to create a macro that will include an emote, plus my attack and damage rolls it would look like this:
#dagger /me rams his dagger home
/roll 1d20+10 vs AC
/roll 1d4+9 Damage
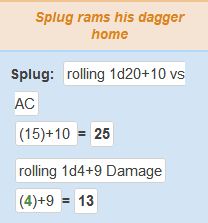
Then, simply by typing #dagger it would run the entire script and look like this:
Macros can also include a mix of command and non-command lines, for example:
#lof
/me calls upon the power of Moradin!
I smite you!
/roll 1d20+4 vs reflex
/roll 1d8+4 damage
This would first emote, then send "I smite you!" to the chat, and then make the two rolls afterwards.
Nesting Macros
Macros can be nested inside each other, which gives the ability to combine macros, and call multiple macros with a single action. To nest a macro, simply include the name of the macro you wish to call on its own line inside your macro.
Example
In this example, we'll have three macros: #damage #attack and #both
Macro #damage = /roll 1d4+11
Macro #attack = /roll 1d20+9
Macro #both =
#attack
#damage
Attribute Macros
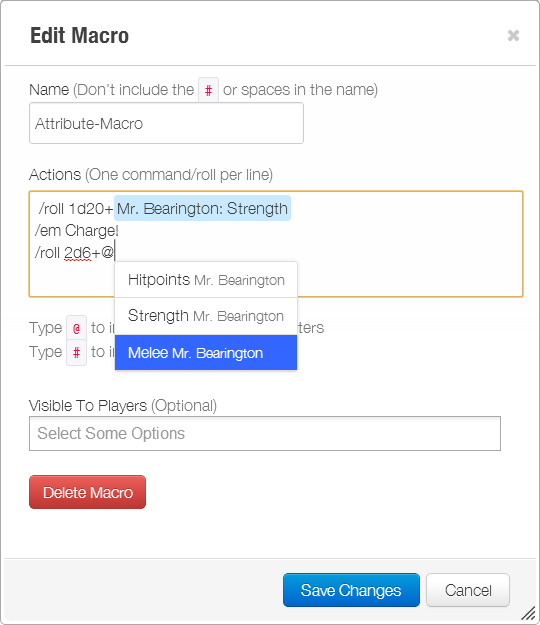
A culmination of the above examples can be used in what we call Attribute Macros. By using an Attribute, that is assigned to a Character, as a variable modifier you can create complex Character based macros. Since the variable used in the Macro is linked to a Character Attribute, the value will sync when changed in the Character editor. The Macro editor supports auto-complete of both nested macros (by pressing “#”) and Attributes from Characters (by pressing “@”).
Tip: When using "@" in the Macro editor use the directional Up and Down key to select the appropriate Attribute.
Video tutorial on using Abilities
A very basic look at using abilities for more simple rolls. (ex. Will Save, Skill Checks, etc.)
Attributes & Abilities
Using a variable with a Macro
If you'd like to use a variable modifier with your macro roll, simply end the macro command with the modifier, and then specify it when calling your macro
Example
If I want a macro for 1d20+x (where x is my variable value) I could create the following macro:
#d20 /roll 1d20+
then, when running the macro, type #d204 to get /roll 1d20+4
Macro Bar
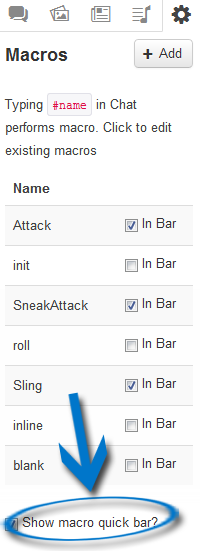
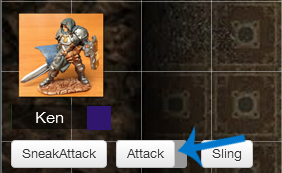
You can also create quick access buttons for any of your macros that will appear in a bar at the bottom of the screen. First, create your macro like normal. Then, to enable the macro quick bar, check off "Show macro quick bar" in the settings menu
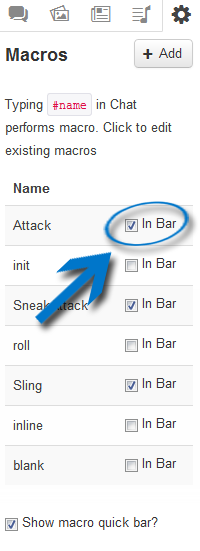
Then, to add a macro to the bar, simply check the "In bar" option next to the macro's name
The quickbar, and any macros that you have selected should now appear on the bottom of your screen, underneath the character portraits. If you'd like to re-arrange the buttons on the bar, hover your mouse over the button that you'd like to move. A handle will appear on the right side of the button. You can drag the button around the bar by using this handle.


