Fog of War
From Roll20 Wiki
The Fog of War features allows you to gradually reveal areas of the map to your players. This is useful if you have a party that is exploring an area like a dungeon, where they shouldn't be able to see parts of the map that have yet to be explored. Fog of War is not the same as darkness, and it is static (not dynamic, like dynamic lighting). Fog of War can only be removed by the GM; the presence or absence of PCs, light sources, lines of sight, etc. will not roll back any Fog of War.
The Fog of War will cover up anything on the tabletop, including all tokens, maps, text, and drawings. The only exception is that a player can see any token that he or she has control over; this prevents players from accidentally moving tokens into a location where only the GM can recover them.
Enabling Fog of War
First, you need to enable the Fog of War for the current page. Go to the Page Settings toolbar, and click the gear icon for the current page. Then check the box next to "Fog of War: Enabled?" and click save. If done properly, the map should become slightly darker, as by default all areas will be hidden.
Note that in the Page Settings dialog you can also adjust the GM Opacity slider, which controls how dark the Fog of War is to you. Slide it to the right to make the opacity darker. If you slide it all the way to the right, the Fog of War will be completely opaque, just as is it is for players.
Revealing/Hiding Areas
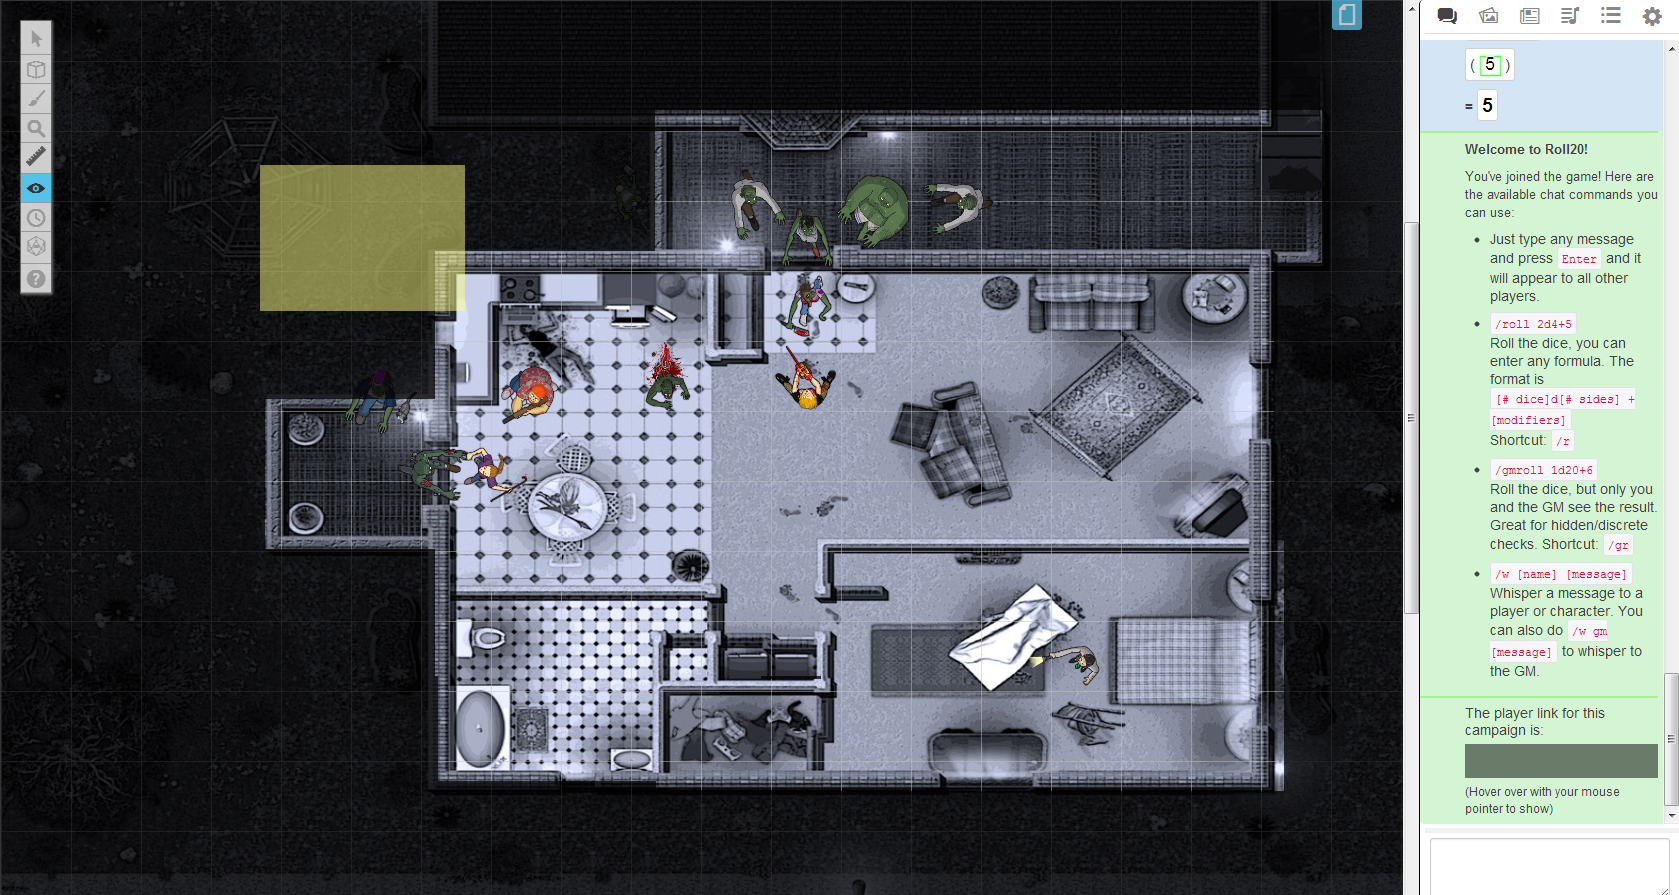
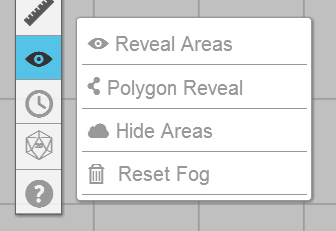
To reveal an area of the map, choose either the Reveal Areas or Polygon Reveal option from the Fog of War tool on the Toolbox (shown above). When using Reveal Areas, just click and drag on the tabletop to create a box (you'll see a yellow selection area appear). When you release the mouse button, the area you have designated will be revealed. To reveal further parts of the map, just repeat this process.
Using the Polygon Reveal tool functions the same way one would use the Polygon/Line Tool from the Drawing section of the Toolbox. Click on the Tabletop where you want the vertices of the polygon to be and a yellow selection area will start taking shape. Hold down the Shift key while drawing to conform the polygon vertices to the grid. Either hit the Escape key or click close to the starting point of the polygon to finish the shape.
If you've made a mistake and you need to re-hide an area of the map, just choose the Hide Areas option from the Fog of War tool on the Toolbox, and then click and drag to select the area to be hidden.
If you would like to cover the Tabletop completely with Fog again, select the Reset Fog option. A confirmation window will appear first to ensure that this action isn't taken by mistake.
Previewing Your Work
If, at any point in time, you wish to see what you're masking looks like from the Player's side, go to the Settings Tab on the Sidebar and scroll down to the bottom and click on the Re-Join as Player button. This will reload Roll20 with the Player's user interface. (Note: Make sure you've set the Players Bookmark Ribbon on the page you're currently working on or else your Tabletop might load an undesired page) To jump back to GM Mode, go back to the Settings Tab and click on the Re-Join as GM button.


