Difference between revisions of "Dynamic Lighting"
From Roll20 Wiki
Nolan T. J. (Talk | contribs) (Beginning of Line of Sight changes.) |
Nolan T. J. (Talk | contribs) m |
||
| Line 19: | Line 19: | ||
== How to Activate Dynamic Lighting == | == How to Activate Dynamic Lighting == | ||
| − | [[File: | + | [[File:Pagesettingslighting.png|thumbnail|Dynamic Lighting & Fog of War checkboxes under Page Settings.]] |
Open up your [[Page Settings]] and check the checkbox to activate Dynamic Lighting for that page. ''You can use Fog of War In combination with Dynamic Lighting, but one is not dependant on the other to function.'' | Open up your [[Page Settings]] and check the checkbox to activate Dynamic Lighting for that page. ''You can use Fog of War In combination with Dynamic Lighting, but one is not dependant on the other to function.'' | ||
| Line 35: | Line 35: | ||
== Adding Light == | == Adding Light == | ||
| − | [[File: | + | [[ File:Tokensettinglighting.png|thumbnail|right]] |
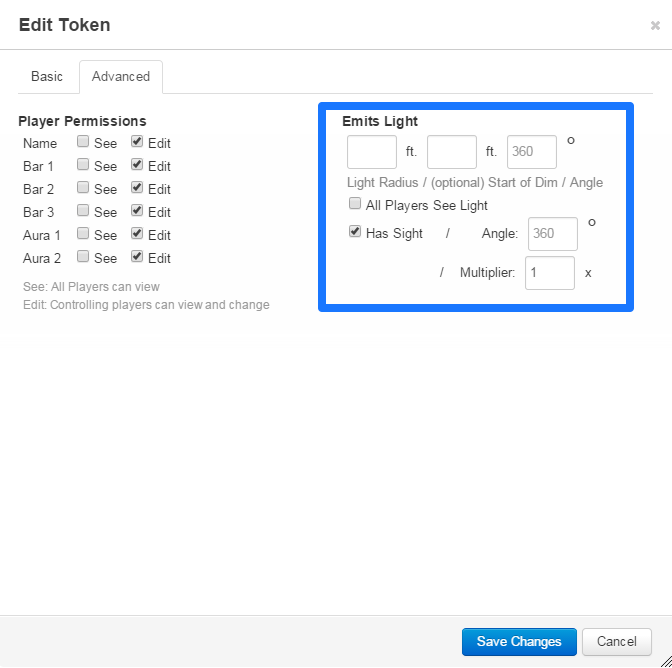
Now that you have your obstacles drawn out on the Dynamic Lighting Layer, you now have to add light to your Page. Light is emitted via tokens. You can manage this in '''Token Settings'''. Under the settings for Auras is the option '''Emits Light'''. This option allows you to enter a light radius amount and gives you a checkbox for '''All Players See Light'''. When the checkbox is left unchecked, the only player(s) who can see that token’s light emission are those who have assigned permission to that token. | Now that you have your obstacles drawn out on the Dynamic Lighting Layer, you now have to add light to your Page. Light is emitted via tokens. You can manage this in '''Token Settings'''. Under the settings for Auras is the option '''Emits Light'''. This option allows you to enter a light radius amount and gives you a checkbox for '''All Players See Light'''. When the checkbox is left unchecked, the only player(s) who can see that token’s light emission are those who have assigned permission to that token. | ||
| Line 44: | Line 44: | ||
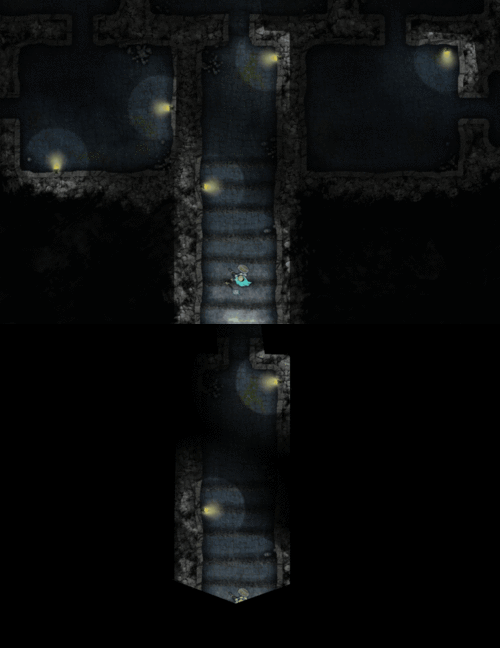
Line of Sight restricts players to only see lights that are within the appropriate field of vision for the tokens that they control. This means that a light on the other side of a wall won’t be visible to a player until they’re in that room, even if it’s a light that’s visible to all players. The image below shows the difference between a dungeon without line of sight, and then with line of sight enabled: | Line of Sight restricts players to only see lights that are within the appropriate field of vision for the tokens that they control. This means that a light on the other side of a wall won’t be visible to a player until they’re in that room, even if it’s a light that’s visible to all players. The image below shows the difference between a dungeon without line of sight, and then with line of sight enabled: | ||
[[File:Lineofsight.gif]] | [[File:Lineofsight.gif]] | ||
| + | |||
GMs can also highlight a token and press Ctrl+L (Cmd+L on Macs) to view the scene restricted to the line of sight of the selected token. | GMs can also highlight a token and press Ctrl+L (Cmd+L on Macs) to view the scene restricted to the line of sight of the selected token. | ||
In addition to the line of sight feature, you can now customize the “angle” of lights and the line of sight of tokens. So you can specify, for example, that a player should only have a 140-degree field of view instead of 360-degrees. | In addition to the line of sight feature, you can now customize the “angle” of lights and the line of sight of tokens. So you can specify, for example, that a player should only have a 140-degree field of view instead of 360-degrees. | ||
As with all Roll20 features, enabling Line of Sight is as easy as checking a box in page settings, and then designating which tokens have “sight” via a checkbox. Simple to use, but it can result in some very compelling gameplay experiences. | As with all Roll20 features, enabling Line of Sight is as easy as checking a box in page settings, and then designating which tokens have “sight” via a checkbox. Simple to use, but it can result in some very compelling gameplay experiences. | ||
Revision as of 22:25, 6 December 2013
| This feature is only available to paid subscribers-- both Mentor and Supporter levels. If this is something you’re interested in, please visit the Supporter Page. |
Dynamic Lighting is an advanced map lighting tool currently available to Mentor & Subscriber users. It calculates line of sight on the fly as tokens are moved across the tabletop.
Contents |
The Dynamic Lighting Layer
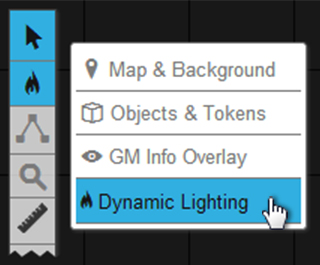
In addition to the Map & Background Layer, the Object & Token Layer and the GM Overlay Layer is the Dynamic Lighting Layer. This fourth layer’s purpose is for laying down lines and shapes that will serve as walls and/or obstacles that will block out light or line of sight.
How to Activate Dynamic Lighting
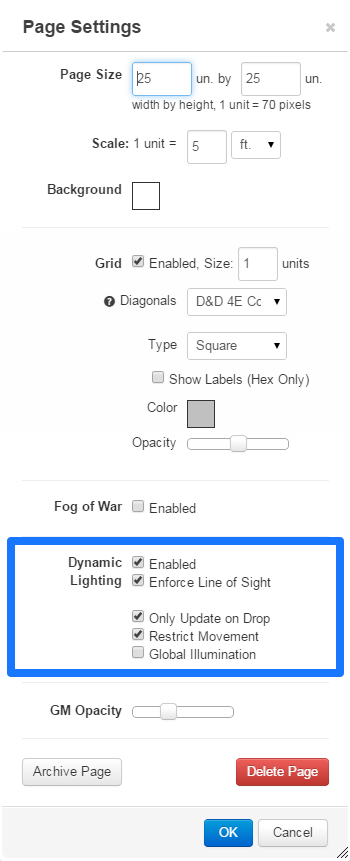
Open up your Page Settings and check the checkbox to activate Dynamic Lighting for that page. You can use Fog of War In combination with Dynamic Lighting, but one is not dependant on the other to function.
If you or your players suffer from sluggish dynamic lighting render results you might want to consider checking the option Only Update on Drop. What this option does when checked is that the tabletop only redraws the dynamic lighting after a token has been picked up and placed elsewhere on the map. This can lessen the render burden for users running on slower connection speeds or when a GM is working with a very large or complex map.
How to Add Light Obstructions
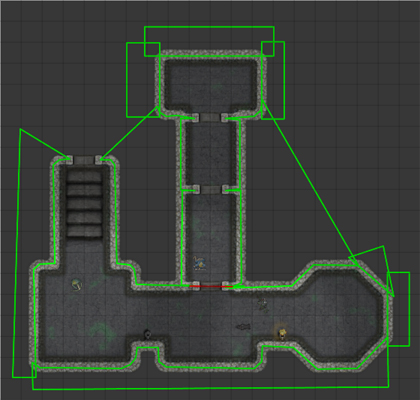
While on the Dynamic Lighting Layer, you can use all of the drawing tools available to create lines and shapes to draw walls, columns, doors, etc. You can also utilize color to help differentiate different types of light obstructions (ex. lime green for stationary dungeon walls and bright red for doors).
Use the drawing tools to draw outlines of all the walls and other pieces of the map that you want to block light. We suggest using the Polygon Tool for best results. Remember that any drawings or tokens added to the dynamic lighting layer are invisible whenever the dynamic lighting layer is not selected. You can use this fact to put overhead or other 'invisible' lighting sources on a map by placing light emitting tokens onto the Dynamic Lighting layer.
Adding Light
Now that you have your obstacles drawn out on the Dynamic Lighting Layer, you now have to add light to your Page. Light is emitted via tokens. You can manage this in Token Settings. Under the settings for Auras is the option Emits Light. This option allows you to enter a light radius amount and gives you a checkbox for All Players See Light. When the checkbox is left unchecked, the only player(s) who can see that token’s light emission are those who have assigned permission to that token.
Line of Sight
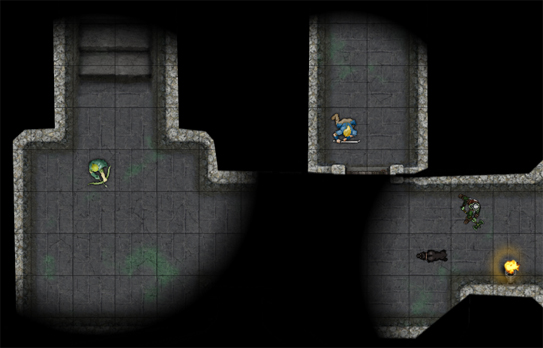
Line of Sight restricts players to only see lights that are within the appropriate field of vision for the tokens that they control. This means that a light on the other side of a wall won’t be visible to a player until they’re in that room, even if it’s a light that’s visible to all players. The image below shows the difference between a dungeon without line of sight, and then with line of sight enabled:
GMs can also highlight a token and press Ctrl+L (Cmd+L on Macs) to view the scene restricted to the line of sight of the selected token. In addition to the line of sight feature, you can now customize the “angle” of lights and the line of sight of tokens. So you can specify, for example, that a player should only have a 140-degree field of view instead of 360-degrees. As with all Roll20 features, enabling Line of Sight is as easy as checking a box in page settings, and then designating which tokens have “sight” via a checkbox. Simple to use, but it can result in some very compelling gameplay experiences.


