Difference between revisions of "Savage Worlds"
From Roll20 Wiki
Mike Combs (Talk | contribs) m (→Quick Edge) |
Mike Combs (Talk | contribs) (→Level Headed Edge) |
||
| Line 145: | Line 145: | ||
If you hover over a a token in the Turn Tracker it will highlight that token on the map. If it represents a group of Extras it will only highlight one. Avoid deleting dead tokens because if you delete the one token you chose to represent a group, the group also disappears from the Turn Tracker. A better choice is to mark them dead with a token indicator overlay, or move them out of the visible portion of the Fog of War. | If you hover over a a token in the Turn Tracker it will highlight that token on the map. If it represents a group of Extras it will only highlight one. Avoid deleting dead tokens because if you delete the one token you chose to represent a group, the group also disappears from the Turn Tracker. A better choice is to mark them dead with a token indicator overlay, or move them out of the visible portion of the Fog of War. | ||
| − | === Level Headed Edge === | + | === Level Headed Edge, Hesitant Hindrance === |
| − | Characters with the Level Headed edge get two cards and select the | + | Characters with the Level Headed edge or Hesitant hindrance get two cards and select the one to play. (Level Headed chooses the best card, Hesitant chooses the lower card or Joker.) For this, just add their token to the Turn Tracker twice. For Improved Level Headed, add three of their tokens to the tracker so they get to choose from the best of three cards. |
=== Quick, Tactician Edges === | === Quick, Tactician Edges === | ||
Revision as of 05:39, 9 July 2020
Savage Worlds on Roll20
The streamlined rules of Savage Worlds are relatively easy to set-up and play in Roll20, even with a free account. With little effort Roll20 can handle Bennies, special dice rolls (Acing/exploding rolls and Wild Card dice), and Action cards for initiative.
GMs can upload or create maps, upload tokens for NPCs and track their stats, and configure the Character Sheet for settings like Rifts, Deadlands, and others.
Players can enter all aspects of their characters into a character sheet for easy die rolling that accounts for wounds and other modifiers, with notes for edges, powers, and gear descriptions.
Common functions (like trait rolls and calculating raises) are easily automated with the basic scripting ability included in the free Roll20 service. Most of the automation (usually called macros) needed to play adventures and campaigns are built into the character sheet, others (to speed up or clarify things) are included in this guide.
Quick Start
Roll20 has more than one way to do things, Savage Worlds has many setting rule variations, and GMs have their own preferences. This guide is going to show you one way to cover the core rules, using only features in a free account. I made some judgement calls along the way to get you up and running as quickly as possible. Looking for another way? There is a section at the end of this for alternative methods and great-but-not-essential enhancements.
- Game Settings— Set defaults for map pages and tokens, select the Character Sheet and set its defaults.
- Savage Worlds (Tabbed) Character Sheet— Automates trait, weapon, and power rolls. Tracks Wounds, Fatigue, and statuses like Shaken and Distracted.
- A custom Benny image— Upload it as an infinite card deck and deal them to players.
- Translucent Blast and Cone images— Upload as a deck or as a token for a character sheet.
- Use a 3rd party app like Discord for sound and video if you have more than two players. There's a technical explanation about better performance, and you also gain easy in-game side-bar conversations, and out-of-game text with your group for things like scheduling.
This guide has lots of other macros and information. You probably don't need it. Call your players, tell them you need 45 minutes to set up, and start playing!
You can also speed up things and make your life easier with those macros:
- Stat Block Macro— Brings up a menu with all of the rolls from the character sheet, without having to open the character sheet.
- Target Stats Macro— Shows the Parry, Toughness and Raises for a target, so players don't have to ask the GM (again).
- GM Macros— Wild Card trait, Extra trait, Melee/Thrown/Range damage, and Run. For when you don't want to create a character sheet for some NPC.
Game Settings
After you create a new game, from the Game Settings menu, select Game Settings.
Game Default Settings
From the Game Settings Page, scroll down and configure this section.
- Page Defaults
- Page Scale: 1 grid cell = 6 ft.
- Grid Measurement: Euclidean
- Token Defaults
- Bar Location: Bottom Overlapping
- Bar Style: Compact
- Player Permissions
- Name: [x]See [x]Edit
- Bar 1: [ ]See [x]Edit Text Overlay: Hidden
- Bar 2: [ ]See [x]Edit Text Overlay: Hidden
- Bar 3: [x]See [x]Edit Text Overlay: Hidden
- Aura 1: [x]See [x]Edit
- Aura 2: [x]See [x]Edit
| Be sure to click Save Defaults at the bottom of this section. |
Character Sheet Template
From the Game Settings Page, scroll down and configure this section.
Select Savage Worlds (Tabbed Layout). I recommend these Default Sheet Settings as a start so that creating NPCs takes fewer steps. You're going to do that a lot, save yourself some clicks.
- [x] Extra
- [x] Start Attributes at d6
- [x] Show Soak Button
- [x] Show Unshake Button
- [x] Show Size fields
- [x] Use Species
- [x] Show Load and Encumbrance
- [x] Show Occupation I use this field to store the URL to NPC art.
| Be sure to click Save Defaults at the bottom of this section. |
In-Game Settings: My Settings
After launching the game, these settings are under the yMy Settings-tab.
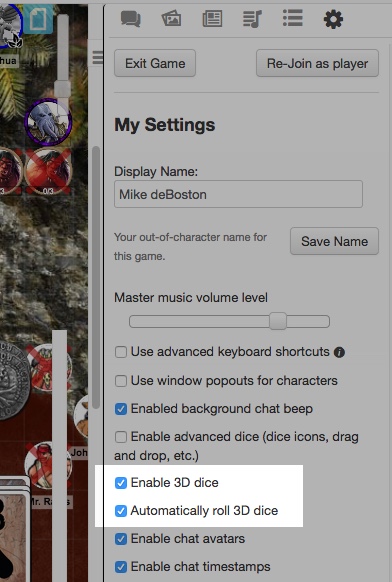
- [x] Use advanced keyboard shortcuts
- [x] Enable 3D dice
- [x] Automatically roll 3D dice
3D Dice
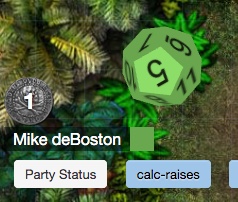
Selecting Automatically roll 3D dice, speeds up the game. Without it, when a die roll is needed it delays the game while a user drags across the table top to set the direction and velocity of the dice throw. The color of the dice will be the same as the color of your chat avatar. Click on the color box of your chat avatar to change it.
In-Game Settings: Game Settings
After launching the game, these settings are under the yMy Settings-tab.
Token Bar Colors + Display Settings.
When you click on a token, three circles show Bar 3, Bar 1, and Bar 2.
- Bar 1: Ivory (for Fatigue)
- Bar 2: Purple (for Power Points)
- Bar 3: Red (for Wounds)
- Status Marker Position: Bottom These tiny icons indicate Shaken, Distracted, etc.
Chat Avatars
- Player Avatar Size: Names only
Video + Audio Chat Options
- Chat Tech: None (no video/audio) For best performance, use a 3rd party application, not something browser-based.
From the [Roll20 Video and Voice Chat Troubleshooting Guide]:
A Roll20 WebRTC call has a suggested download and upload bandwidth of 512Kbps per additional user in the chat. That means that in a six person call (five users other than yourself), you would need around 2.5Mbps of bandwidth for a stable call. If your group has members whose connections cannot support these requirements we suggest using a 3rd party, non-browser based chat option, that can make use of both hardware acceleration and data-compression to lower bandwidth requirements.
Tracking Bennies
In Savage Worlds, Bennies are tokens the players (and GM) may redeem to reroll the dice and change the story. Players start each session with three Bennies and are awarded more for good roleplaying or when a Joker is drawn during initiative.
In order to easily track Bennies, create a custom card deck.
- On the l Collection-tab, look at Decks, click Add.
- In the New Deck dialog:
- Name the deck Bennies.
- Set Cards in Deck = Infinite, Considered = Drawing.
- Set Card Size to 105x105 (usually a good value since the grid is 70x70).
- Upload an image (like a coin or poker chip) for the card back. A good size for the art is 210x210px, so it looks good zoomed up.
- Upload the same image for the card front.
- Select Show Deck.
This [poker chip art] is free to use.
You can then shuffle and deal the "deck" just like a deck of cards and the users will receive their Bennies as normal.
To play a Benny:
- Open the card hand window: Click on the Benny icon above your player name at the bottom of the screen.
- Drag a Benny onto the table top.
- Close the card hand window: Click again on the Benny icon above your name.
- Right click on the Benny on the table top and select Delete. We like the way they look on the table, so we wait until the end of the encounter to delete them.
Using Cards for Initiative
In Savage Worlds, Action cards (poker cards with jokers) are dealt to players to determine initiative order. Play order is a countdown from Ace to Two, with Jokers going first, and ties resolved in reverse alphabetical order (Spades, Hearts, Diamonds, Clubs). Some characters may get more than one card, some groups of extras may get one to represent the group.
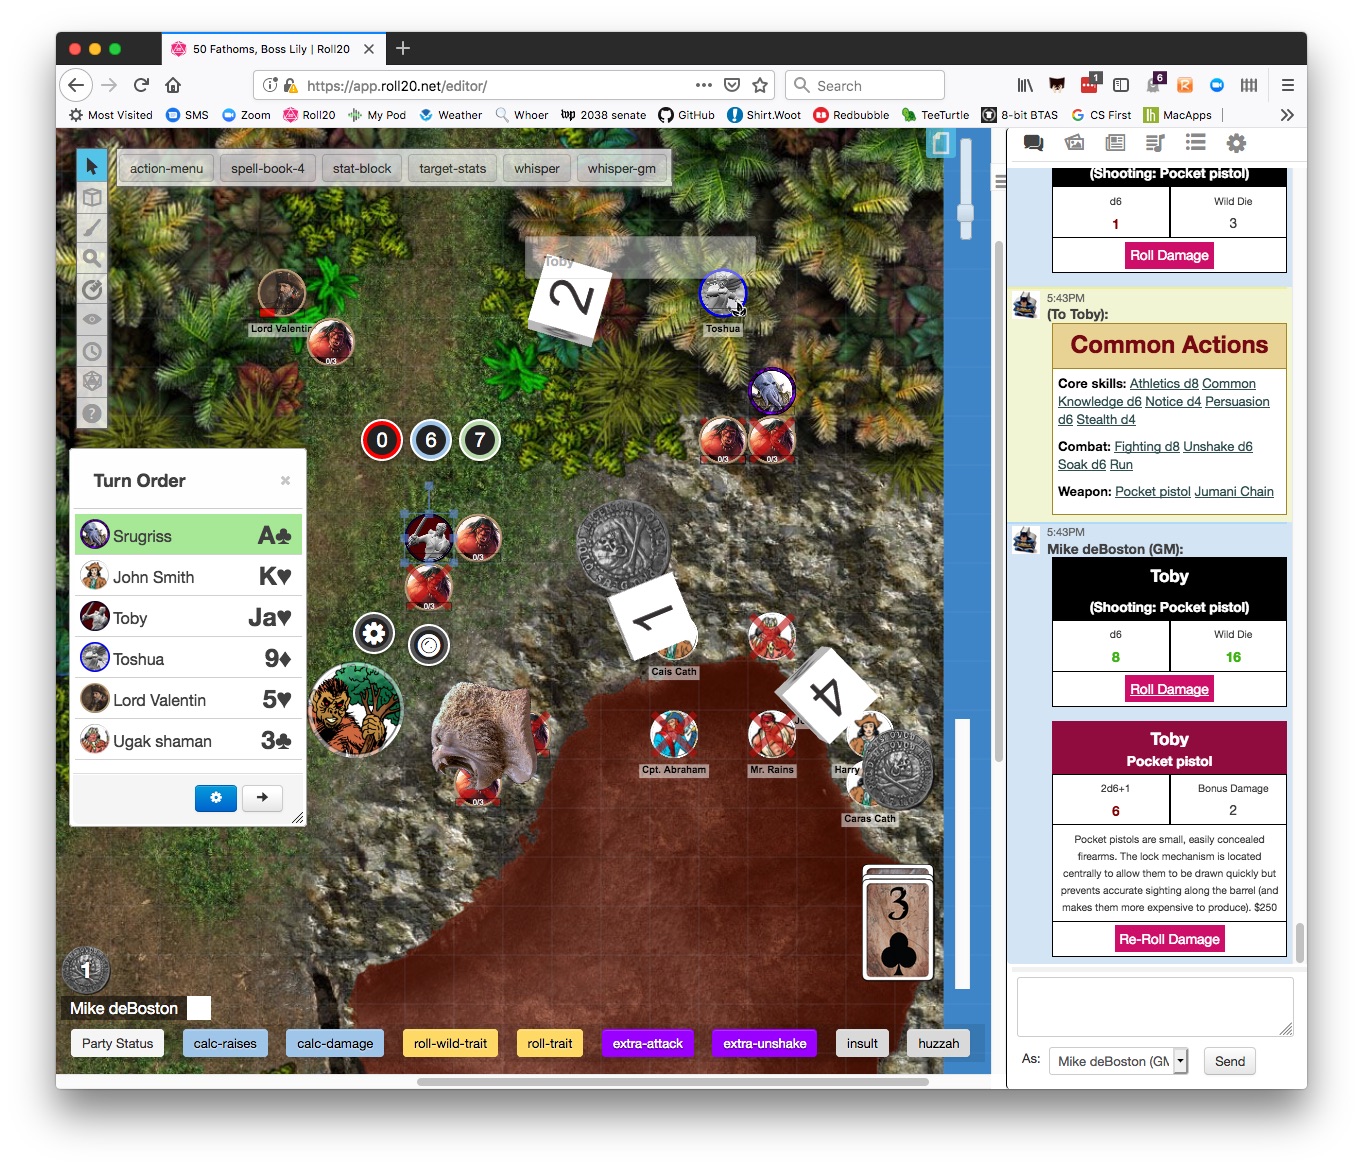
Roll20 helps automate initiative with the Turn Tracker. Open the Turn Tracker from the menu (or by pressing 'y').
Add tokens to the Turn Tracker by selecting tokens and pressing 'u'. (If Advanced keyboard shortcuts are not enabled, you can also do this by right clicking on tokens and choosing the Add Turn options from the pop-up menu.)
Show the deck of Action cards by going to the l Collections-tab, scrolling to Playing Cards and clicking Show.
Deal a card to each token in the Turn Tracker by clicking "Deal" on the Action Cards deck, then clicking "Deal Cards to Turn Order Items" from the pop-up window. (You don't have to type anything into the number box.)
Once the cards are dealt, open the Turn Order Settings dialog (click the blue gear icon) and press the "By Card/Suit" button to sort the Turn Tracker.
If you hover over a a token in the Turn Tracker it will highlight that token on the map. If it represents a group of Extras it will only highlight one. Avoid deleting dead tokens because if you delete the one token you chose to represent a group, the group also disappears from the Turn Tracker. A better choice is to mark them dead with a token indicator overlay, or move them out of the visible portion of the Fog of War.
Level Headed Edge, Hesitant Hindrance
Characters with the Level Headed edge or Hesitant hindrance get two cards and select the one to play. (Level Headed chooses the best card, Hesitant chooses the lower card or Joker.) For this, just add their token to the Turn Tracker twice. For Improved Level Headed, add three of their tokens to the tracker so they get to choose from the best of three cards.
Quick, Tactician Edges
Characters with the Quick edge get an extra Action card if their card is a 5 or less. Tacticians get an extra Action card and may use it or give it to an allied Extra.
You can manually deal new or extra cards (or cards) to them by selecting "Deal" from the Action deck's popup menu, or you can just click on it to make a card flip up, then click and drag that card to the tracker. (And if they have access to the deck, they can do it themselves.)
You can manually deal cards to the Turn Tracker. To draw a card the GM clicks on the card sticking out of the deck; this flips it face up. (The deck must have "Show deck to players" enabled.) Then the GM drags the card onto the Turn Tracker to the card next to the character's name, and when the number turns yellow the GM drops the card.| Note: You can't just click and drag the card from the deck or the table. You have to click so it flips face up on the deck, then click and drag to the Turn Tracker. |
The card on the turn tracker, or drop point, turns yellow when the mouse pointer is over it. The drop point is only activated by the mouse pointer, not the card. This is easiest to do if the GM picks up the card on the upper left corner, because then it is easier to see the background color of the number in the Turn Tracker turn yellow.
Character Sheets
Character Sheets allow you to track your character's traits, edges, powers, and gear. The creator of a game can choose a character sheet template when setting up the game, and all characters in the game will use that sheet template. Use the guides below for specific versions of available character sheets.
- Savage Worlds (Tabbed) Character Sheet (Updated for SWADE, April 2019)
Statblock Macro
With the 'statblock' macro, you can access almost any PC or NPC action in three clicks: Click the token to show the token macro bar, click the 'statblock' macro to see a menu of options, then click the action. Compared to using the character sheet, this takes up less screen space and is faster to access. (This draws from info in the character sheet.) Create this as a token macro.
statblock (macro) shows stat block as chat menu with clickable actions.
/w @{selected|token_name} %{selected|fullstatblock}
Target Stats Macro
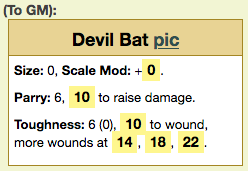
With the 'target-stats' macro, players can click on an NPC token and see the Parry and Toughness target numbers, and roll numbers needed for Raises. The scale modifier is based on the attacker being size 0. Output is whispered to the player in the chat window, so it doesn't clutter up the window for other players. Create this as a token macro.
target-stats (token macro) shows Size, Parry, and Toughness with calculated Raises and Wounds. By Mike deBoston
/w @{selected|token_name} &{template:info} {{item=@{target|Token|token_name} [pic](~target-pic) }} {{**Size**=@{target|Token|size}, **Scale Mod:** +[[floor(@{target|Token|size}/4)*2]]. }}{{Parry=@{target|Token|parrycur}, [[@{target|Token|parrycur}+4]] to raise damage. }} {{Toughness=@{target|Token|toughnesscur} (@{target|Token|toughnessArmor}), [[@{target|Token|toughnesscur}+4]] to wound, more wounds at [[@{target|Token|toughnesscur}+8]], [[@{target|Token|toughnesscur}+12]], [[@{target|Token|toughnesscur}+16]]. }}
Target Pics Macro
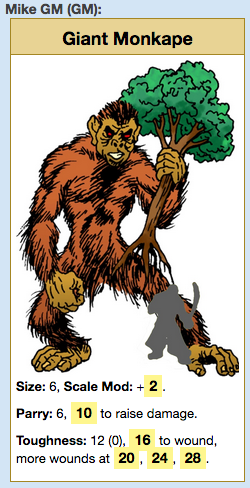
This is similar to the target-stats macro, but it also shows a picture of the target character. To make this work, paste a URL to the picture into the Occupation field on the Character Sheet. I've found that Google Drive and Dropbox don't work for this, but IMGUR does. Create this as a token macro.
target-pic (token macro) shows picture, Size, Parry, and Toughness with calculated Raises and Wounds. By Mike deBoston
/w @{selected|token_name} &{template:info} {{item=@{target|Token|token_name} }} {{[picture NA](@{target|Token|occupation}) **Size**=@{target|Token|size}, **Scale Mod:** +[[floor(@{target|Token|size}/4)*2]]. }} {{Parry=@{target|Token|parrycur}, [[@{target|Token|parrycur}+4]] to raise damage. }} {{Toughness=@{target|Token|toughnesscur} (@{target|Token|toughnessArmor}), [[@{target|Token|toughnesscur}+4]] to wound, more wounds at [[@{target|Token|toughnesscur}+8]], [[@{target|Token|toughnesscur}+12]], [[@{target|Token|toughnesscur}+16]]. }}
Tokens for Characters and Creatures
Tokens in Roll20 can represent PCs and NPCs (and other objects) on the map. Tokens have artwork, a name, and may also have a 3–6 attributes (like Parry or Wounds) and a link to a character sheet.
Hints for Token Artwork
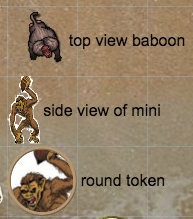
Top view token art provides the most realism but the least detail because you mostly see the top of the NPC's head and shoulders.
Side view token art provides the most complete view, but since they're displayed at 70px tall most detail is lost and they can be difficult to see on a map.
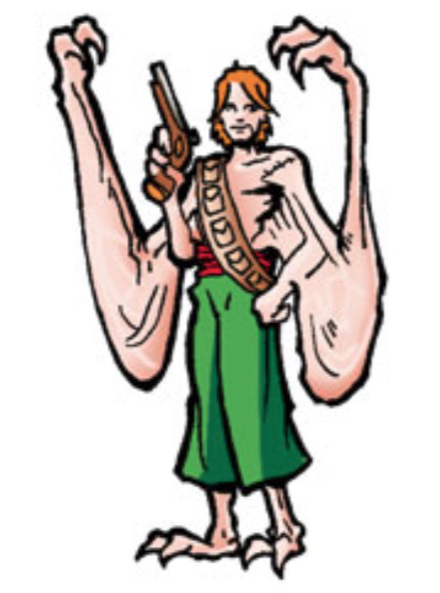
Round token art has head and shoulder portraits with a colored circle border and is generally preferred. They're easy to see and provide the most facial detail, and there are free applications and web sites that make it easy to scale and crop the portrait art into a round token. They don't show clothing, weapons, hands, and other details but these can be in the full side-view art in the character sheet, or a Journal handout, or in the q Chat tab (via a macro).
Token Art Size: For standard-sized creatures, tokens will displayed as 70x70px, the default map grid size. To look good at 200% zoom, make the token 140x140px or larger. If you're creating a token that is the head and shoulders clipped from a larger portrait, you'll want the clipped portion to be 140 square and this generally means that the larger (source) portrait will be 300–400px wide. If you use smaller source material, your tokens will look blurry.
Methods of representing characters as tokens
There are three major ways to configure tokens and stats: Just art, character sheets with unlinked bars, and with linked bars.
- Just art--- Place token art on the map, keep the key stats like parry and toughness elsewhere (like on paper). When you need to roll an attack, use basic dice commands like
/roll 1d6!. But because players cannot see the Parry, Toughness, and Armor values, they'll have to ask the GM (over and over) and can make combat take longer.
- Character sheet with unlinked bars--- Create a character sheet for the creature, then link the token to it. Then also link the character sheet to the token. This lets access the character sheet for special attacks, but each token has their own wounds. This is handy for Extras. Details on this method are below.
- Character sheet with linked bars--- Create a character sheet for the creature and link the token and token bars (like wounds, fatigue, or ammo) to it. Then also link the character sheet to the token. This lets stats (like wounds, fatigue, or ammo) be adjusted on the token and update the character sheet. This is useful for Wild Cards, bosses and unique NPCs. Details on this method are below.
Token method: Character Sheet
This method ties the token to a character sheet. It's very helpful because it provides a quick reference to the Edges, Powers and all the attributes of the character. For Wild Cards, this is worth the time to set up, and possibly for commonly encountered Extras, but this depends on how much time you want to allocate to entering the data.
1. Create the character sheet. You should at least enter Parry, Toughness, Fighting skill, Strength, and the Weapon, and Spirit. If it's an extra, and they're not likely to try to soak wounds, you don't even need to enter Vigor.
2. Create a token. Size it on the map correctly. New tokens dragged from the character sheet will use this size.
3. Link the token to the character sheet. Edit the token and use the **Represents Character** drop-down menu (on the Basic tab).
4. OPTIONAL Link the token bars. Skip this step if there will be multiple tokens linked to a single character sheet, like Extras (guards), and even for Wild Cards (several captains).
You should do this step if you want adjustments to the Wounds, Fatigue, Power Points or ammo on the token to make changes on the character sheet. It's handy for recurring villains. This step connects the status bars overlaid on the token to stats on the character sheet, so trait rolls will automatically account for wound and fatigue penalties. These also link the bubbles shown when the token is selected so you can edit the values without having to open the character sheet.
Here's a setup for fatigue, power points, and wounds. This makes it easy for players to edit those values as the game progresses. If the character doesn't have power points, just leave it blank, or use it for ammo. Set the field value for each Bar on the Basic tab with the drop-down menu. Type the first few letters of the field value to find it faster.
| Field | Field Value | Bar Color | See | Edit |
|---|---|---|---|---|
| Name | Xena | yes | yes | |
| Bar 1 | fatigue | bone | no | yes |
| Bar 2 | powerpoints | purple | no | yes |
| Bar 3 | wounds | red | yes | yes |
Bar colors are set for the entire game; set them on the yMy Settings tab.
See and Edit, and Bar Location and Bar Style can be set on the Advanced tab of the Edit Token box but it's better to set them for all tokens in Game Settings. Use See=Yes on Bar 3 so other players can see Wounds (but not fatigue, for example). Use Edit=Yes on all bars so that the player can change the values without having to open their character sheet. Set Bar Location = Bottom Overlapping and Bar Style = Compact.)
On the token, bars without a value (no wounds, no fatigue, no expended power points) will not be shown. The player will see all three bars for their character, and the GM will see all bars for all characters, but other players will only see the wounds bar.
5. Save Changes on the Token. Click Save Changes to close the Edit Token box. You have configured the token on the map, but if you delete the token you will lose those settings. To place that token on another map you'd have to copy and paste this one. If you drag the art out onto the map again, you will be creating a new token and it won't have these settings.
In the next step you will set the character sheet to use this token with all of the settings so far. The character sheet will remember these settings, so the token can be deleted and added again at any time.
6. Link the Character Sheet to the Token. Shift-double-click on the token to open the linked character sheet. At the top right, click Edit. In that screen, remove the old default token if there is one, then click to add the selected token.
| Many people overlook step seven and lose their work so far, or find that new tokens don't have the right settings. |
7. Save Changes on the character sheet. Test this by dragging the character sheet (by the name, not the handle icon) onto the map. Check to see that this new token has all of the correct settings.
Area of Effect (Blast & Burst) Templates
Savage Worlds uses blast (round) and burst (cone) templates to determine which characters are impacted by various area of effect spells. You can place these images on the map over the tokens.
If you upload templates as art and then drag them onto the map, they will resize to match the grid (70x70). One way around this is to configure the templates to be the right size, then link each to its own special character sheet. When you want to put an AoE template on the map, drag on the "character".
- Use the Savage Worlds art or create new template art.
- Save as PNG or GIF with a transparent background.
- In the PArt Library-tab, click Upload. You can drag all templates at once into the dialog box.
- (optional) Store them into a folder "AoE templates". Try to keep your Recent Uploads list empty by putting everything in folders.
- Place the art on the map.
- Right-click the art and select Advanced > Is Drawing.
- Right-click the art and select Advanced > Set Dimensions.
- Size it correctly; Roll20 grids are 70px per inch.
- Small blast is 2", 140px by 140px
- Medium blast is 4", 280px by 280px
- Large blast is 6", 420px by 420px
- Burst is 3"x9", 210px by 630px. In some burst templates the cone image only occupies the top half of the template. These are designed so they rotate around the caster. Set the size to 210px by 1330px.
Once your templates have been uploaded and sized, in the Journal tab, create a folder named "Area of Effect templates".
- Inside the folder create a character named "blast, small".
- Select the token, click the settings Gear, and link the token to the character sheet. (Save your settings.)
- Open the character sheet, link it to the token.
- Make the character sheet visible and editable by all players. (Save your settings.)
- Repeat for each token: "blast, medium", "blast, large", "burst".
- If you've made different tokens for different trappings you might make character sheets like "blast, medium fire" or "burst, swarm".
You start with some free Area Effect templates here.
To use the templates, find them in the Journal folder and drag them (by the name) onto the center of where you want them (usually on the spell caster for Bursts or in the crowd of enemies for Blasts).
States and tokens
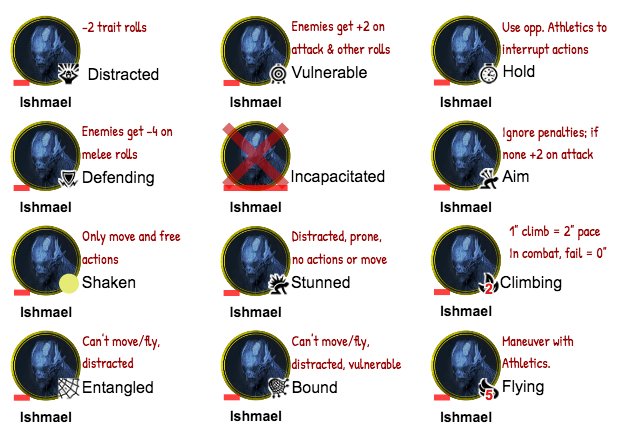
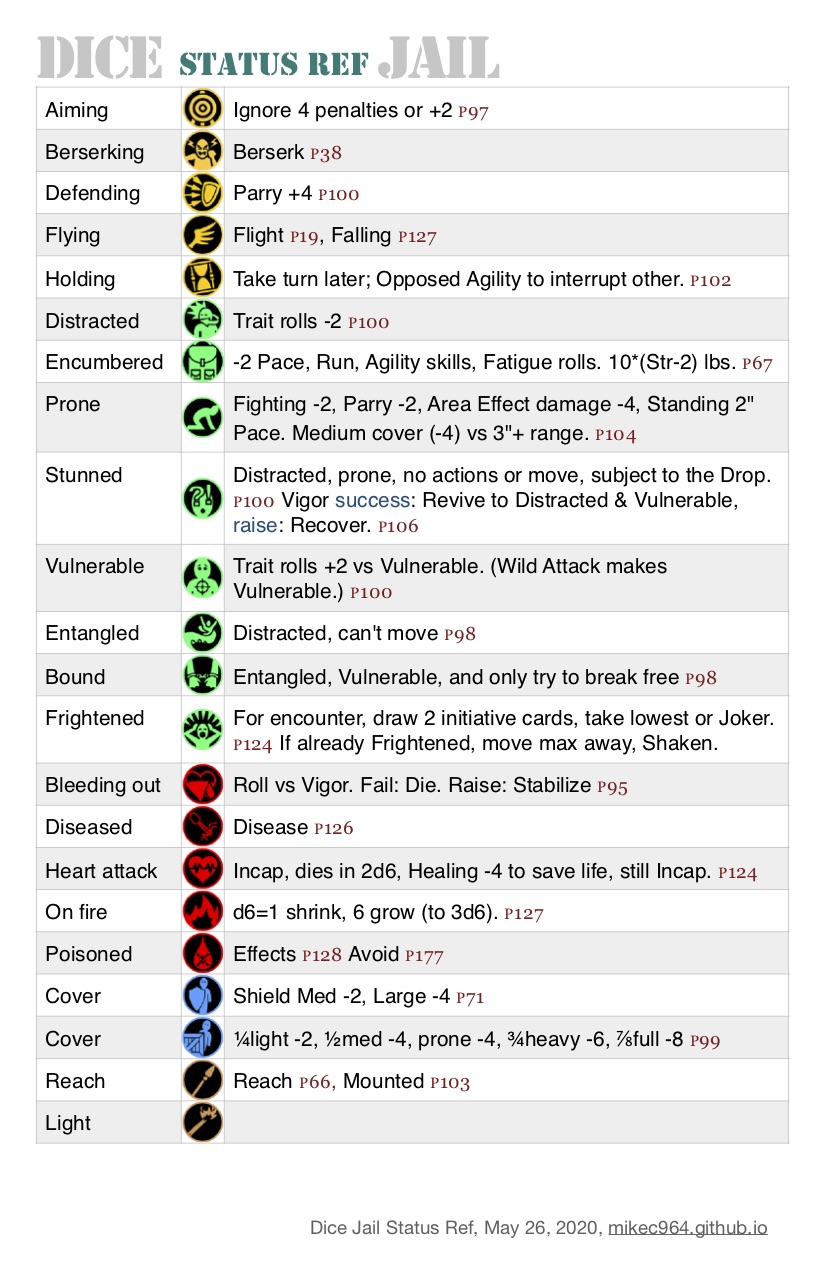
A lot of bad things can happen to Savage Worlds characters, and many are represented by states. You can use Roll20's Token Markers to provide visual reminders.
You can overlay a single digit on top of any Token Marker icon, to indicate things like flying height in inches or 10s of inches. Hover the mouse pointer over the wing icon and press a single digit. Fatigue and Wounds could be indicated this way, but it's generally better to use the token bars instead.
Token Markers have no effect on Roll20's calculations so you can use any indicator for any purpose. This convention is a good place to start. (The name of the status and the red text aren't part of the marker. Use this chart or create one like it as a handout in the N Journal-tab.
Custom Savage Worlds Token Markers
| Since January 2020, you can also create Custom Token Markers. |
[Browse Token Markers for Savage Worlds] in the Roll20 Marketplace.
This is a lot of steps but it should only take a few minutes.
- Download the set to your computer.
- From your game launch page (before you launch it), locate the Token Marker Sets box (bottom right).
- Click the + button.
- In the 'Add Token Marker Sets' box, click "Create New Set".
- On the 'Token Marker Library' page, click "+Create Set".
- In the 'Create Token Marker Set' dialog box, type "SWADE Starter Token Markers".
- On the 'Add images to your new token marker set' page, click "Add Images".
- (finally) Drag all of the downloaded images to this page.
- Click to save after upload the set.
- Click to save after the option to rename them.
Now that the Token Marker set has been uploaded, set Roll20 to use them in your game, and to stop using the default set.
- Go back to your game launch page and locate the Token Marker Sets box again (bottom right).
- Click the + button.
- In the 'Add Token Marker Sets' box, type "SWADE", then select your new set and click Update.
- Click on the menu button next to the Default Set and select "Remove from this game".
Chases
Savage Worlds (Deluxe) Chases and Roll20 An example and explanation in the forum
Tables
Tables in Roll20 use a weight for each row instead of a die range. (Rolling a 2 on 2d6 is a 1/36 chance, so the weight is 1.) The weights are shown below.
When you create the table in Roll20, enter the Weight and the Description columns. You don't need to enter the first column.
Injury
Since a result from one table roll cannot trigger a roll on a sub-table, so in those cases (like injury), the weights have been adjusted and the sub-tables have been added to the main table.
If you name the table 'injury', you can get the results by typing '[[1t[injury]]]' in the chat box.
| 2d6 (and 1d6) | Weight | Description |
|---|---|---|
| 2 | 6 | Unmentionables |
| 3–4, then 1–3 on d6 | 15 | Targeted (or right) arm |
| 3–4, then 4–6 on d6 | 15 | Targeted (or left) arm |
| 5–9, then 1–2 on d6 | 48 | Guts (Broken) |
| 5–9, then 3–4 on d6 | 48 | Guts (Battered) |
| 5–9, then 5–6 on d6 | 48 | Guts (Busted) |
| 10–11 | 30 | Leg |
| 12, then 1–3 on d6 | 3 | Head (Hideous Scar) |
| 12, then 4–5 on d6 | 2 | Head (Blinded) |
| 12, then 6 on d6 | 1 | Head (Brain Damage) |
| 2d6 (and 1d6) | Weight | Description |
|---|---|---|
| 2 | 6 | Unmentionables |
| 3–4, then 1–3 on d6 | 15 | Targeted (or right) arm |
| 3–4, then 4–6 on d6 | 15 | Targeted (or left) arm |
| 5–9, then 1–2 on d6 | 48 | Guts (Broken) |
| 5–9, then 3–4 on d6 | 48 | Guts (Battered) |
| 5–9, then 5–6 on d6 | 48 | Guts (Busted) |
| 10–11 | 18 | Leg |
| 12, then 1–2 on d6 | 2 | Head (Hideous Scar) |
| 12, then 3–4 on d6 | 2 | Head (Blinded) |
| 12, then 5–6 on d6 | 2 | Head (Brain Damage) |
Fear
The SWADE Fear table is a d20 plus a modifier of 0 to 4. Because Roll20 does not directly support modifiers, you can either implement it as five tables or as a macro. If you implement it as five tables it will roll the d20 and show you the result from the table. If you implement it as a macro it will roll the d20, show you the entire table, and you can just read down to find the result.
The macro method is the easiest so it's here. The five tables method is at the Alternatives section of this page.
fear-table prompts for the fear penalty, rolls the die, and shows the ENTIRE table. You select the result manually. By Mike deBoston
&{template:info} {{item=Fear Table}} {{+?{Fear Modifier|0} fear roll=[[1d20 +?{Fear Modifier}]]. }} {{1–3=Adrenaline surge (Joker) }} {{4–6=Target Distracted }} {{7–9=Target Vulnerable }} {{10–12=Target Shaken }} {{13.=Mark of Fear: Target Stunned, cosmetic alteration }} {{14–15=Frightened: Target Hesitant for encounter, or Panicked }} {{16–17=Panicked: Target runs away, Shaken}} {{18–19=Target gains Minor Phobia Hindrance}} {{20–21=Target gain Major Phobia Hindrance}} {{22+=Heart Stutters: Target rolls Vigor-2. **Success**=Stunned. **Fail**=Incapacitated, dies in 2d6 [[2d6]] rounds, Healing -4 to save life but remains Incapacitated.}}
Vehicles
If you name the table 'vehicle-ooc', you can get the results by typing '[[1t[vehicle-ooc]]]' in the chat box.
| 2d6 | Weight | Description |
|---|---|---|
| 2 | 1 | Major collision |
| 3–4 | 5 | Minor collision |
| 5–9 | 24 | Distracted |
| 10–11 | 5 | Vulnerable |
| 12 | 1 | Glitch |
If you name the table 'vehicle-critical-hit', you can get the results by typing '[[1t[vehicle-critical-hit]]]' in the chat box.
| 2d6 | Weight | Description |
|---|---|---|
| 2 | 1 | Scratch/dent |
| 3 | 2 | Guidance/traction |
| 4–5 | 7 | Locomotion |
| 6–8 | 16 | Chassis |
| 9–10 | 7 | Crew |
| 11 | 2 | Weapon |
| 12 | 1 | System |
| 2d6 | Weight | Description |
|---|---|---|
| 2 | 1 | Roll over |
| 3–4 | 5 | Spin |
| 5–9 | 24 | Skid |
| 10–11 | 5 | Slip |
| 12 | 1 | Flip |
| 2d6 | Weight | Description |
|---|---|---|
| 2 | 1 | Scratch/dent |
| 3 | 2 | Engine |
| 4 | 3 | Locomotion |
| 5 | 4 | Controls |
| 6–8 | 16 | Chassis |
| 9–10 | 7 | Crew |
| 11 | 2 | Weapon |
| 12 | 1 | Wrecked |
Finding Games
Pro Account Features for Savage Worlds
The free Roll20 service is powerful and easy enough to run a complete Savage Worlds adventure or complete campaign with the Base Account subscription. The Pro Account adds animated FX options and the ability to create and run APIs for advanced automation, including some that are particularly useful for Savage Worlds.
FX
You can add animated effects for Bolt, Burst, and Blast area effects. These macros will get you started. Many more (and custom ones) are available.
blast-spell-fx (macro) prompts for the target token and the type of blast. By Mike deBoston
/fx explode-?{type|fire|frost|water} @{target|token_id}
bolt-spell-fx (token macro) prompts for the target token and the type of bolt. By Mike deBoston
/fx beam-?{type|fire|frost|water} @{selected|token_id} @{target|token_id}
burst-spell-fx (token macro) prompts for the target token and the type of burst. By Mike deBoston
/fx breath-?{type|fire|frost|water|slime} @{selected|token_id} @{target|token_id}
APIs
This isn't a list of all of the advantages of a Pro Account or all of the API Scripts, just a selection that might be particularly helpful for Savage Worlds.
API: Import Stat Block -- NOT WORKING, APRIL 2020 This saves a lot time creating Character Sheets for NPCs and creatures from the bestiary. All you have to do is copy a stat block from a PDF or other source into the GM Notes section of a token, then type "!SW-Import" into the q Chat tab and it will create the Character sheet for you.
API: Token Mod: Want to remove the Stunned state and apply the Distracted and Vulnerable states with one command? Want to do that for 5 tokens with one command? This enables macros to set token status indicators like shaken, vulnerable, and prone. These can be set manually by clicking on the token, clicking the indicator button, scrolling the menu, and clicking on the status indicator, but with macro control you could set them by name or set them for several Extras at the same time.
API: Deal Init: Want to quickly handle initiative for players with Quick or Level Headed? Roll20 API Script to Deal Initiative for Savage Worlds Games. DealInit supports Savage Worlds style card based inititive by dealing cards to the Turn Order and sorting the order by suit. It does not, however, utilize the Roll20 deck system. Instead it manages an internal array of cards that are reshuffled when the deck runs out or a joker is drawn. It also checks character attributes for any SW Inititative Edges and handles them appropriately.
API: Bennies: to ease dealing Savage Worlds Bennies to players. You can also use it to grant Conviction, count Mass Battle tokens, or keep track of Social Conflict Influence.
Organizing Content
As you upload art, tokens, portraits, maps, handouts and other material, here are some tips to get the most from your storage allowance and still rapidly find things.
P Art Library tab
All uploaded art will appear in the PArt Library, even if it is directly uploaded into a card deck, handout, map, or character sheet. All uploaded art counts against your storage allowance, and it is shared across all games you create. Here are some strategies for organization. This will help you avoid duplicates and find things quickly.
Roll20's art management system can be unreliable, so it's wise to create art folders on your local computer that mirror the folders you will create on Roll20, and to keep local copies of your art so it can be uploaded again if needed.
When art is uploaded, immediately put it into a folder.
| Your goal should be for the Recent Uploads section to be blank. |
- Bestiary for goblins, guards, etc
- NPCs for named NPCs and Wild Cards
- Player Characters
- Cards and Bennies
- Scenes
- Handouts
- Maps (named locations)
- 0 Terrain (generic jungle, tavern)
- 0 Tokens (trees, rocks, saloon tables)
If you're going to run games in vastly different settings (fantasy and science fiction), then you can create top-level folders for this and use the folders above as sub-folders.
N Journal tab
The N Journal is unique to each game. Good organization here will help you find things while playing. Items in the Journal that are shared with all players will have a blue dot after their name.
Start with a good folder system.
- Roll20 Tips
- Setup for audio, browser add-ons, whatever
- Shortcuts for Roll20
- Useful macros, how to attack, use power, take damage
- Player Characters
- Gear (Tip: Just paste in screen shots.)
- Weapons, armor, and vehicles
- Ships (if your vehicles have character sheets)
- Handouts
- Maps
- Subfolders for nations, continents, realms, etc.
- Rules (Just paste in screen shots)
- Skills, Edges, Hindrances
- Raise calculator
- References for states, power modifiers
- Bestiary
- NPCs
- Subfolders for locations
- Macros
- Character sheets (pc-macros, gm-macros, power-macros) used for storing scripts
Script/Macro/Ability Resources
| This section needs some cleanup. Many of the macro examples here are already implemented in the Tabbed Character Sheet. |
Scripts are the lines of code that automate Roll20. When they are stored in the l Collection tab they are called Macros. When they are stored in the Abilities & Attributes-tab of a Character sheet, they are called Abilities.
The scripts in this guide will have a name and some code, and sometimes an explanation of the code in italics. Scripts (macros) will be shown like this:
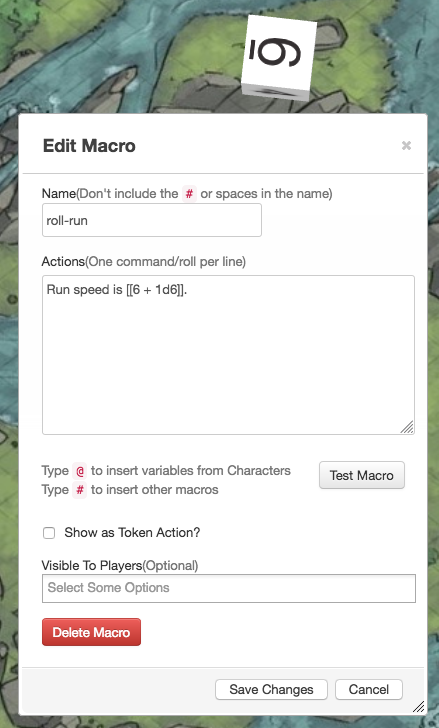
roll-run
Run speed is [[6 + 1d6]].
Syntax: The code 1d6 rolls one d6. Surrounding the roll with [[ shows only the total. Hover over the result to see a tool tip with the values of the die roll.
To save a scripts as a Macro in the l Collection tab:
- On the l Collection tab, Macros, click Add.
- In the Edit Macro dialog, enter the name and script.
- (Usually) Set Visible to Players = All Players.
- (Sometimes) Set Show as Token Action = True. (These appear in a second macro bar only when a token is selected.)
If the previous example is saved as a Macro named roll-run, players can access it by:
- Typing #roll-run in the chat window. (After typing '#ro', you can press tab to auto-complete the phrase.)
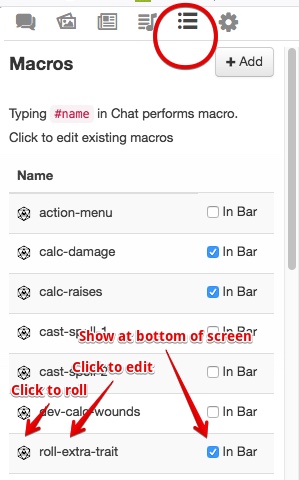
- Opening the l Collection tab and clicking the t dice icon for the macro.
- Selecting "Show Macro Quick Bar" in the l Collection tab, and selecting "In bar" for the macro.
- Clicking the Macro name in the l Collection tab and selecting "Show as Token Action".
Acing (Exploding) Die Rolls
In Savage Worlds, Trait and Damage rolls can Ace. Each time the die rolls its max value, you add that value and roll again.
This example rolls a d4. You can type this script into the qChat tab and see the result there. If the die rolled a 1 the result will be in a red box. If a die aced it will be shown in a green box.
/r 1d4!
/r rolls dice. 1d4! rolls 1d4 and enables acing on the die.
This example macro prompts for the die to roll, a modifier, and some descriptive text.
roll-trait
Trait roll is [[ d?{Die type|6}! + ?{Modifier|0} ]] to ?{Reason|do nothing}
?{Question|Default} prompts the user to enter a value. Surrounding the roll with [[ shows only the result of the roll. Hover over the result to see a tool tip with the values of the dice.
Wild Card Die Rolls
When making trait rolls, Wild Card characters roll an extra d6 and take the highest of the Trait die or Wild die.
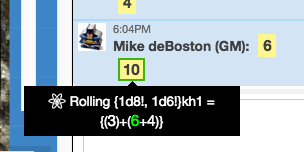
Here's an example that rolls a d8 and the d6 wild card die. You can type this script into the qChat tab and see the result there. If either die rolled a 1, the result will be in a red box. If a die aced it will be shown in a green box.
[[ {1d8!, 1d6!}kh1 ]]
{x,y}kh1 keeps the highest one of the two dice. Surrounding the roll with [[ shows only the result of the roll. Hover over the result to see a tool tip with the values of the dice.
This example prompts for the die type and modifier, then rolls with a d6 wild card die.
roll-wild-trait
Wild card trait roll is [[{d?{Die type|6}!, d6!}kh1 + ?{Modifier|0}]] to ?{Reason|do nothing}
?{Question|Default} prompts the user to enter a value. Surrounding the roll with [[ shows only the result of the roll. Hover over the result to see a tool tip with the values of the dice.
Damage Rolls
Damage rolls are made after a successful attack (fighting, throwing, shooting) roll, and the damage total gains an extra d6 if the attack roll was a raise. The easiest way to do this is to show the extra d6 roll and let the player add it.
Damage roll is [[1d6! + 1d8!]] and bonus damage is [[1d6!]].
These three scripts prompt for the strength die, weapon dice, modifiers and AP, and roll the optional d6 for the raise bonus. (If you hover over the raise result, the popup text will explain when to apply it.)
melee-damage (strength die + weapon die, applies to melee weapons)
The melee damage is [[?{Strength die|d6, d6!|d4, d4!|d8, d8!|d10, d10!|d12, d12!|d12+1, d12!+1|d12+2, d12!+2} + ?{Weapon die|d6|d4|d8|d10|d12}! + ?{Modifier|0}]] AP(?{AP|0}). Raise bonus: [[1d6! Add raise bonus if the fighting roll got a raise.]]
thrown-damage (strength die + weapon die, applies to melee weapons)
The range damage is [[?{Strength die|d6, d6!|d4, d4!|d8, d8!|d10, d10!|d12, d12!|d12+1, d12!+1|d12+2, d12!+2} + ?{Weapon die|d6|d4|d8|d10|d12}! ]] AP(?{AP|0}). Raise bonus: [[1d6! Add raise bonus if the shooting or throwing roll got a raise.]]
range-damage (weapon dice, applies to bows and guns)
The range damage is [[?{Number of dice|2}?{Weapon die|d6|d4|d8|d10|d12}! + ?{Modifier|0}]] AP(?{AP|0}). Raise bonus: [[1d6! Add raise bonus if the shooting roll got a raise.]]
Calculating Raises and Wounds
In Savage Worlds, a roll is a success if it is at least the Target Number (TN, typically 4), and every 4 points above the TN is called a Raise.
This script computes the number of raises on a 2d6 damage roll against a toughness of 5. The result is the number of raises or a negative number if there was no success.
/r floor({2d6!!-5}/4)
Syntax: floor(x) rounds down.
This calc-raises macro prompts for the roll total and target number, then returns the number of raises. A negative result is a failure, a 0 is a success.
calc-raises
calc raises: [[ floor( (?{Roll value} - ?{Target number|4} ) /4) ]] raise(s) (0 is success)
In Savage Worlds, some weapons have an armor piercing (AP) value which allows them to bypass up to that many points of armor. (A Glock handgun does 2d6 AP2 damage.) Character's toughness is noted as total toughness followed by armor in parenthesis, like 11 (1). The handgun would ignore 1 point of toughness, so the target has a net toughness of 10.
This calc-damage macro prompts for damage, toughness, armor, and armor piercing damage to calculate net damage to the target. Armor piercing damage bypasses that up to that many points of armor, so the macro subtracts the smallest of the AP damage or armor from the toughness.
calc-damage
Net damage= [[ ?{Damage|7} - (?{Toughness|5} - {?{Armor|3}, ?{AP Damage|2}}kl1) ]]
Syntax: {x,y}kl1 returns the lower of the two values.
This calc-wounds macro prompts for net damage and the shaken status of the target. In Savage Worlds the target gains 1 wound per raise in net damage, or if there are no raises, 1 wound if the target is shaken.
calc-wounds
Wounds = raises. If no raises, +1 wound if shaken.
Wounds = [[ ?{Shaken|No,floor( ?{Net damage} /4)|Yes,{floor( ?{Net damage} /4),1}kh1}} ]]
| When nesting queries, characters terminating innermost rolls must be replaced with HTML entities: } must be } , must be , and | must be |. |
| If a macro with substitutions is saved, the next time it is opened the substitutions will be gone and you will have to enter them again. Consider saving backup copies of these macros in your GM notes. |
For ease of reading, here's the same macro without substitutions:
Wounds = raises. If no raises, +1 wound if shaken. Wounds = [[ ?{Shaken|No,floor( ?{Net damage} /4)|Yes,{floor( ?{Net damage} /4),1}kh1}} ]]
Area Effect and Group Macros
When we blast a group of Extras, we use this macro. The faster way to do it would be to roll two Agility dice and take the best result and apply it to the whole group. But thanks to macros, we can check each one individually very quickly.
area-effect-damage prompts for the damage roll and four targets, then makes the rolls for them and calculates raises. By NeilGiraffeTyson
?{Number of dice|2|3|4} ?{Dice size|4|6|8|10|12} &{template:info} {{name=Area Effect Damage}} {{Note=Each target rolls **?{Number of dice}d?{Dice size}** damage and Agility -2 to avoid. If prone, damage is -4.}} {{``@{target|Token 1|token_name}`` =[[?{Number of dice}d?{Dice size}!]] Damage; Evade [[@{target|Token 1|agility_rank}-2]] }}{{@{target|Token 1|token_name} gets wounds at=[[(@{target|Token 1|toughnesscur}-?{AP|0})]], [[(@{target|Token 1|toughnesscur}-?{AP|0})+4]], [[(@{target|Token 1|toughnesscur}-?{AP|0})+8]], [[(@{target|Token 1|toughnesscur}-?{AP|0})+12]] }} {{``@{target|Token 2|token_name}`` =[[?{Number of dice}d?{Dice size}!]] Damage; Evade [[@{target|Token 2|agility_rank}-2]] }}{{@{target|Token 2|token_name} gets wounds at=[[(@{target|Token 2|toughnesscur}-?{AP|0})]], [[(@{target|Token 2|toughnesscur}-?{AP|0})+4]], [[(@{target|Token 2|toughnesscur}-?{AP|0})+8]], [[(@{target|Token 2|toughnesscur}-?{AP|0})+12]] }} {{``@{target|Token 3|token_name}`` =[[?{Number of dice}d?{Dice size}!]] Damage; Evade [[@{target|Token 3|agility_rank}-2]] }}{{@{target|Token 3|token_name} gets wounds at=[[(@{target|Token 3|toughnesscur}-?{AP|0})]], [[(@{target|Token 3|toughnesscur}-?{AP|0})+4]], [[(@{target|Token 3|toughnesscur}-?{AP|0})+8]], [[(@{target|Token 3|toughnesscur}-?{AP|0})+12]] }} {{``@{target|Token 4|token_name}`` =[[?{Number of dice}d?{Dice size}!]] Damage; Evade [[@{target|Token 4|agility_rank}-2]] }}{{@{target|Token 4|token_name} gets wounds at=[[(@{target|Token 4|toughnesscur}-?{AP|0})]], [[(@{target|Token 4|toughnesscur}-?{AP|0})+4]], [[(@{target|Token 4|toughnesscur}-?{AP|0})+8]], [[(@{target|Token 4|toughnesscur}-?{AP|0})+12]] }} {{*More*=[Roll Again](~player-macros|area-damage)}}
Other Macro Resources
Here are some older threads on the forum that explain more about setting up Macros in Roll20 for Savage Worlds. They may or may not work with the Savage Worlds (Tabbed) sheet:
- Some macros I made for Savage Rifts (Necron99, 2017)
- Easy Savage Worlds Macros (Andrew L, 2016)
- Example of Setting up Character Sheets and Macros (PaladinTodd, 2014)
- Some General Macros: Rate of Fire 3, etc. (John R, 2014)
Alternative Methods
This guide has been written around a common and proven way to use Roll20 to play Savage Worlds. This section documents other ways of accomplishing the same goals.
Bennies
If you are using a setting with special Bennies, you might have to create extra cards. For example, Deadlands: Reloaded uses a Benny pool made up of Poker Chips called Fate Chips. There are 20 white chips, 10 red chips and 5 blue chips in the Fate Chip pool.
Create your deck as before, upload an image of a poker chip as the background, and red, white, and blue chip images. Then create 20 new cards called White Chip using the white chip image (pull from the Art tab, don't upload again). Repeat for the red and blue chips, making 10 and 5 of each. In Deck Options make sure that "cards in deck are infinite" is NOT checked.
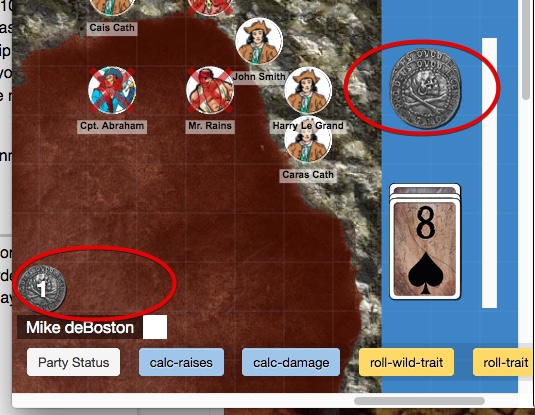
Extra cool: If your Bennies look like coins or tokens, create several with different rotations and offsets, so they look more like coins on the table.
[These Pirate coin Bennies are free to use.]
Tokens: Keeping Stats in Token Bars
Key stats--- Place key stats into the token and use token macros for attacks by the creature. This can be relatively fast, because you typically only need Parry, Toughness, Spirit, Fighting and Damage. Tokens can hold 3–6 stats.
The key stats method stores parry and toughness in the token. You can also store spirit, and the primary attack to-hit and damage values in the token. The right balance depends on how much time you're willing to take to enter the information into the token.
Think of the tokens as art plus seven data fields, and use those fields to make combat easier without having to create a full character sheet. Each token has a name field, and three bars each with a value and a maximum value. You can fill just the two values for parry and toughness, or fill in up to all seven, as suits you.
Wounds are not stored for Extras, but for wild cards, extras that can sustain wounds, the wounds can be indicated with a red status dot and the wound value.
| Field | Field Value | Example |
|---|---|---|
| Name | Name or URL to image file | http://example.com/fjdi/soldier.png |
| Bar 1 | parry | 5 |
| Bar 1 max | attack1-hit | The soldier swings his sword: [[1d6!]]. |
| Bar 2 | toughness | 5 |
| Bar 2 max | armor | 0 |
| Bar 3 | spirit | d6 |
| Bar 3 max | attack1-damage | The soldier's cutlass slashes: [[2d6!]] damage. |
You can hide the bars so they don't obscure the token and map. If the value or max is blank, that bar will not be shown. If both values for the bar have a value, it will be visible to the GM. On the Basic tab make sure the controlling player is blank. On the Advanced tab, you can make bars invisible to the controlling player by deselecting Edit, and invisible to all players by deselecting See.
With the Key Stats method you use four macros to complete the automation:
- extra-stats:
/desc [picture](@{target|Extra|token_name}?raw=1#.jpg) Parry @{target|Extra|bar1}, Toughness @{target|Extra|bar2(@{target|Extra|bar2|max}) - extra-attack:
@{selected|bar1|max}. [roll damage](~extra-damage) - extra-damage:
@{selected|bar3|max} - extra-unshake:
They attempt to unshake: [[@{selected|bar3}!]].
| Replace the ~ in the extra-attack with ! #, See note in previous section on nested macros for why. |
| If you have images stored on the web, you can use them via their URL. For images in Dropbox, remove the ``?dl=1`` code from the end of the URL. The *extra-stats* macro appends ``?raw=1#.jpg`` to the URL to make it work; this is only needed for Dropbox. |
| If you're using character sheets and an avatar, you can edit and right click on the avatar and copy that URL to use for the Name field. Since it's using the storage Roll20 uses, it's quite fast. |
Area of Effect options
Tips for better AoE template art
- Create templates for different types: Fire, Water, Lightning, Swarms, etc.
- Make parts inside the blast template transparent, like the space between insects, or an inward spiral for a tornado funnel.
- Set them to be about 50–30% transparent (must be a PNG for this) so you'll be able to see tokens under them.
- For templates that look good even when zoomed in, make the art twice as big as necessary.
- You can use animated GIFs for templates.
- It can slow things down to aim (and rotate) the cone token when it's placed on the map. That's because Roll20 rotates around the center instead of the tip of the cone. If you make the art for the token 210px x 630px, but on a transparent background that is 210px x 1260px, the burst will now rotate around the tip.
AoE Templates as card decks
You can also store the templates in card decks, one deck for each template size. Original discussion
All decks will look the same size while in the player's hand, so it's helpful to have backs that are labelled small, medium, and large.
Advantages:
- Players can have cards for just the types (fire, lightning) that are appropriate
- Players don't have to access the Journal tab to get the templates
Disadvantages:
- It takes up more screen space by their handle.
- Players have to pick up their template to return cards to their hand.
- While the template is covering another player's token, that player can't click on their token to access macros or other features.
Create the card decks:
- Create four decks (in the lCollection-tab): small blast, medium blast, large blast, burst.
- In each deck set the size correctly.
- For all decks, select Cards in deck are infinite, Allow choosing cards to GM + Players, Played facing = Face Up, and Considered = Drawings.
- Drag the deck window to the left, click "add card", that window will open a little to the right. Click the P Art Library tab and drag over the appropriate template. Repeat for each template and deck.
At the start of the session, show the decks, let the players take the cards that match their spells and trappings, then hide the decks. Players will put the card/AoE template on the table when they need it. After use, the player can right-click and select Take Card to put it back in their hand.
AoE Templates as Multi-sided Tokens
| This section needs more clear instructions |
You can make a rollable table with each "row" a different trapping, so when the player drags the character token onto the table they can change the token to show the fire/water or other trapping of their choice.
This makes the Journal AoE folder less cluttered, but it can slow down players when they have to right-click to select the trapping.
Fear Table Results Only
If you only want to see the results of a Fear Table roll, and not the entire Fear Table, you can implement the Fear table as five tables. Create tables named fear0, fear1, fear2, fear3, and fear4. Enter the weights from the +0 wt column into the fear0 table, the +1 wt column into the fear1 table, etc.
You can get the results for a fear roll by typing '[[1t[fear0]]]' in the chat box, or for fear penalty 1 type `[[1t[fear1]]]'.
You can use the t-fear macro to roll the correct table.
t-fear prompts for the fear penalty, then rolls on the appropriate fear table. By Mike deBoston
Fear table (pg124) d20 + ?{penalty|0|1|2|3|4}: [[ 1t[fear[[1d0+?{penalty}]]]]]]]
| d20+0 | +0 wt | +1 wt | +2 wt | +3 wt | +4 wt | Effect |
|---|---|---|---|---|---|---|
| 1-3 | 15 | 10 | 5 | - | - | Adrenaline surge (Joker) |
| 4-6 | 15 | 15 | 15 | 15 | 10 | Target Distracted |
| 7-9 | 15 | 15 | 15 | 15 | 15 | Target Vulnerable |
| 10-12 | 15 | 15 | 15 | 15 | 15 | Target Shaken |
| 13 | 5 | 5 | 5 | 5 | 5 | Mark of Fear: Target Stunned, cosmetic alteration |
| 14-15 | 10 | 10 | 10 | 10 | 10 | Frightened: Target Hesitant for encounter, or Panicked |
| 16-17 | 10 | 10 | 10 | 10 | 10 | Panicked: Target runs away, Shaken |
| 18-19 | 10 | 10 | 10 | 10 | 10 | Target gains Minor Phobia Hindrance |
| 20-21 | 5 | 10 | 10 | 10 | 10 | Target gain Major Phobia Hindrance |
| 22+ | - | - | 5 | 10 | 15 | Heart Stutters: Target rolls Vigor -2. Success=Stunned. Fail=Incapacitated, dies in 2d6 rounds, Healing -4 to save life but remains Incapacitated. |


