Difference between revisions of "Using Roll20 while Playing In-Person"
From Roll20 Wiki
Andreas J. (Talk | contribs) m (→See Also) |
Andreas J. (Talk | contribs) m |
||
| Line 16: | Line 16: | ||
::'''A.''' '''Just show the players information.''' e.g. Maps, images, handouts, initiative, dice rolls, etc. | ::'''A.''' '''Just show the players information.''' e.g. Maps, images, handouts, initiative, dice rolls, etc. | ||
| − | :::'''Option 1''': Add another computer and log into the game as a player. Just '''remember''', all players will see what the logged-in player's character sees. You may want to create a "dummy" account that has [[Journal#Can_Be_Edited_.26_Controlled_By|permissions]] set to control/edit all the other PC's or just a single character that represents the party. The GM can also control the "Player's" token(s) or allow a player to manage the player's actions. | + | :::'''Option 1''': Add another computer and log into the game as a player. Just '''remember''', all players will see what the logged-in player's character sees. You may want to create a [[Dummy Account|"dummy" account]] that has [[Journal#Can_Be_Edited_.26_Controlled_By|permissions]] set to control/edit all the other PC's or just a single character that represents the party. The GM can also control the "Player's" token(s) or allow a player to manage the player's actions. |
:::'''Option 2''': In addition to option 1, add a TV/Monitor to the player's computer. Connect to a 2nd viewing source using the appropriate cables, or connect wirelessly using [https://www.google.com/intl/en_us/chromecast/tv/#?discover Chromcast] or similar device. You may want to include a wireless mouse and keyboard as well for convenience. | :::'''Option 2''': In addition to option 1, add a TV/Monitor to the player's computer. Connect to a 2nd viewing source using the appropriate cables, or connect wirelessly using [https://www.google.com/intl/en_us/chromecast/tv/#?discover Chromcast] or similar device. You may want to include a wireless mouse and keyboard as well for convenience. | ||
| Line 76: | Line 76: | ||
* [[Browser]] | * [[Browser]] | ||
* [[Community FAQ]] | * [[Community FAQ]] | ||
| + | * [[Dummy Account]] | ||
<br> | <br> | ||
<br> | <br> | ||
[[Category:Guides]] | [[Category:Guides]] | ||
Revision as of 15:59, 21 May 2021
This page will offer tips and suggestions for using Roll20 to enhance your in-person game play. Please add additional tips and update this page as needed.
Contents |
Roll20 at your In-person game
Roll20 offers many features for GM's and players. It's only natural to want to include them at our real-world gaming tables. Here are some tips and suggestions to help enhance your real-world table.
Add additional computers and/or a TV/Monitor
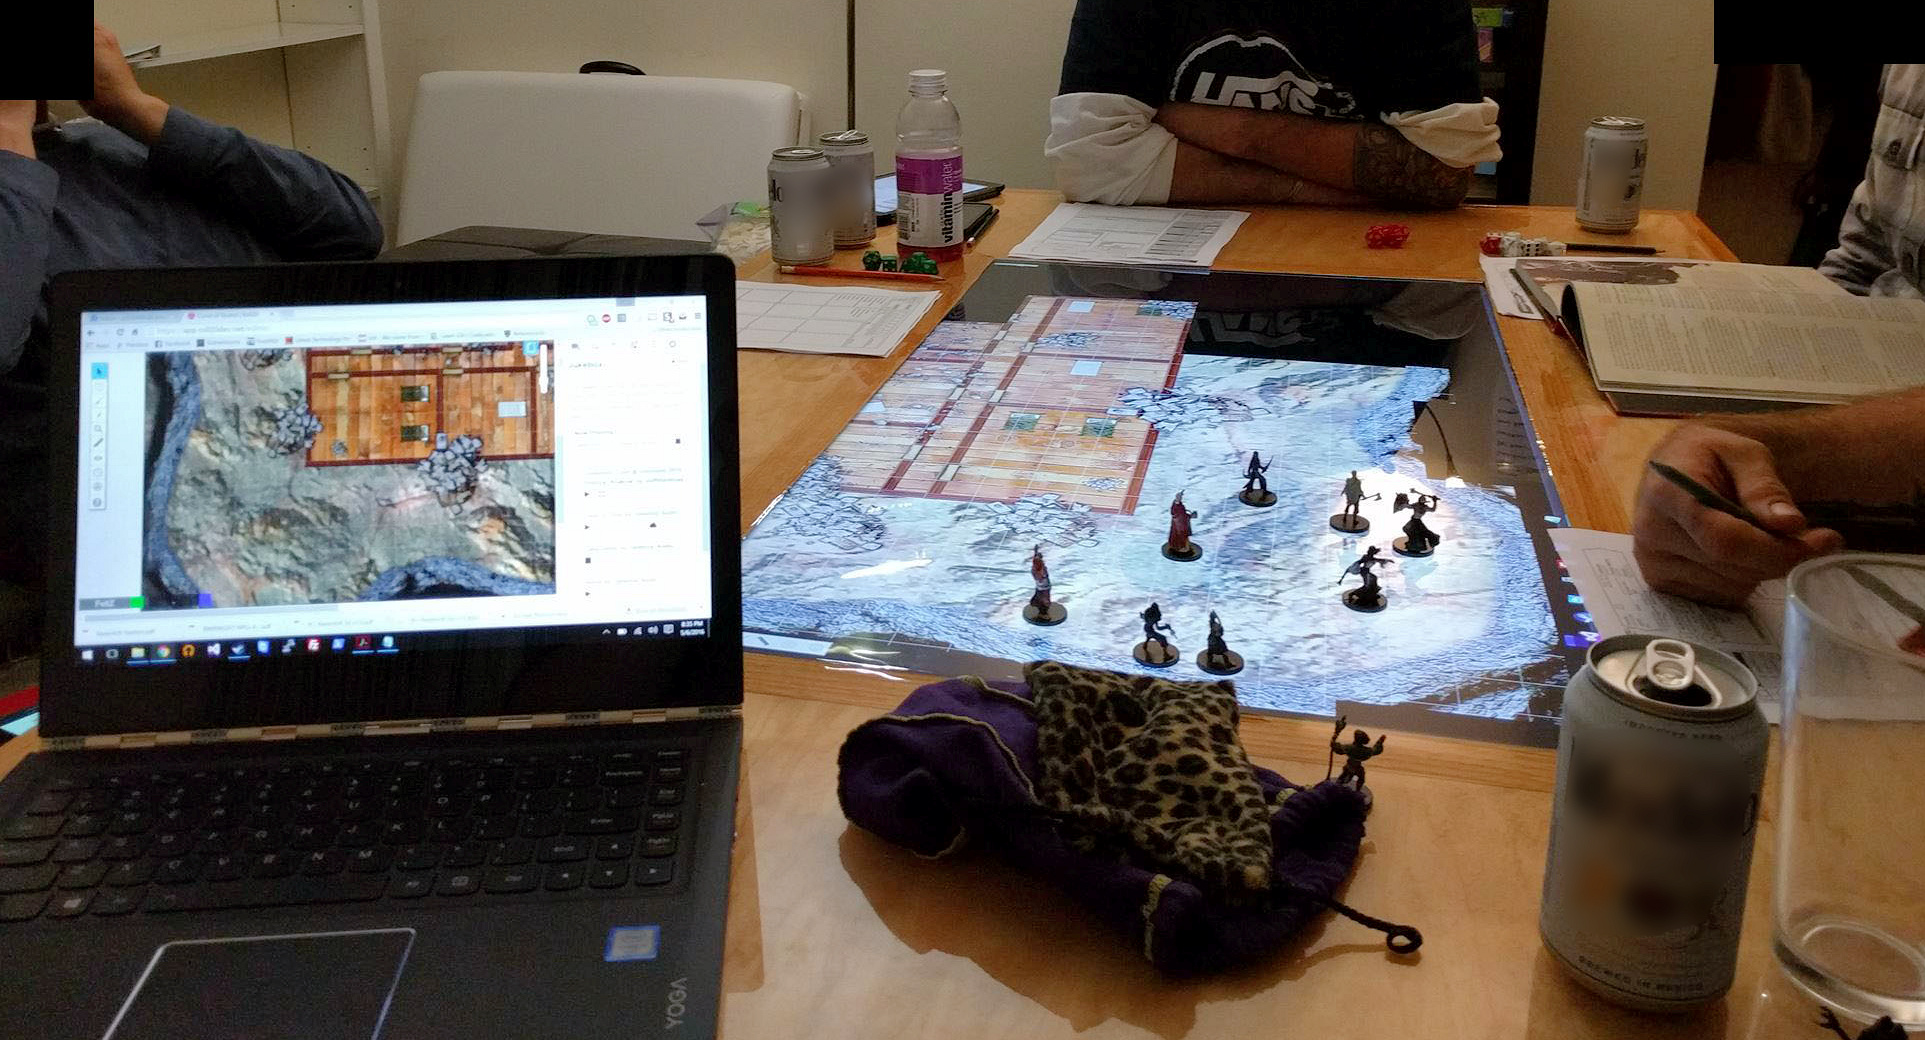
A common setup to enhance your home game with Roll20 is to add computers to your tabletop game. This typically consists of using two or more computers. One for the GM and at least one other computer for the player(s). You may also want to add a TV/Monitor as well.
1. GM Computer: Use one computer for the GM logged into the GM's account. Like a "GM's screen", this will be for the GM's eyes only.
- Use Roll20 to quickly bring up NPC, monster, or character stats. Track initiative and turn order for combat. Roll dice and use custom macros to resolve various scenarios of your game. The list goes on. Including a GM's computer with Roll20 access may be all you require, however adding additional computers for players offers significantly more options.
2. Player Computer: Add additional screen(s) for the players.
- The best method for your group will depend on what you wish to accomplish.
- A. Just show the players information. e.g. Maps, images, handouts, initiative, dice rolls, etc.
- Option 1: Add another computer and log into the game as a player. Just remember, all players will see what the logged-in player's character sees. You may want to create a "dummy" account that has permissions set to control/edit all the other PC's or just a single character that represents the party. The GM can also control the "Player's" token(s) or allow a player to manage the player's actions.
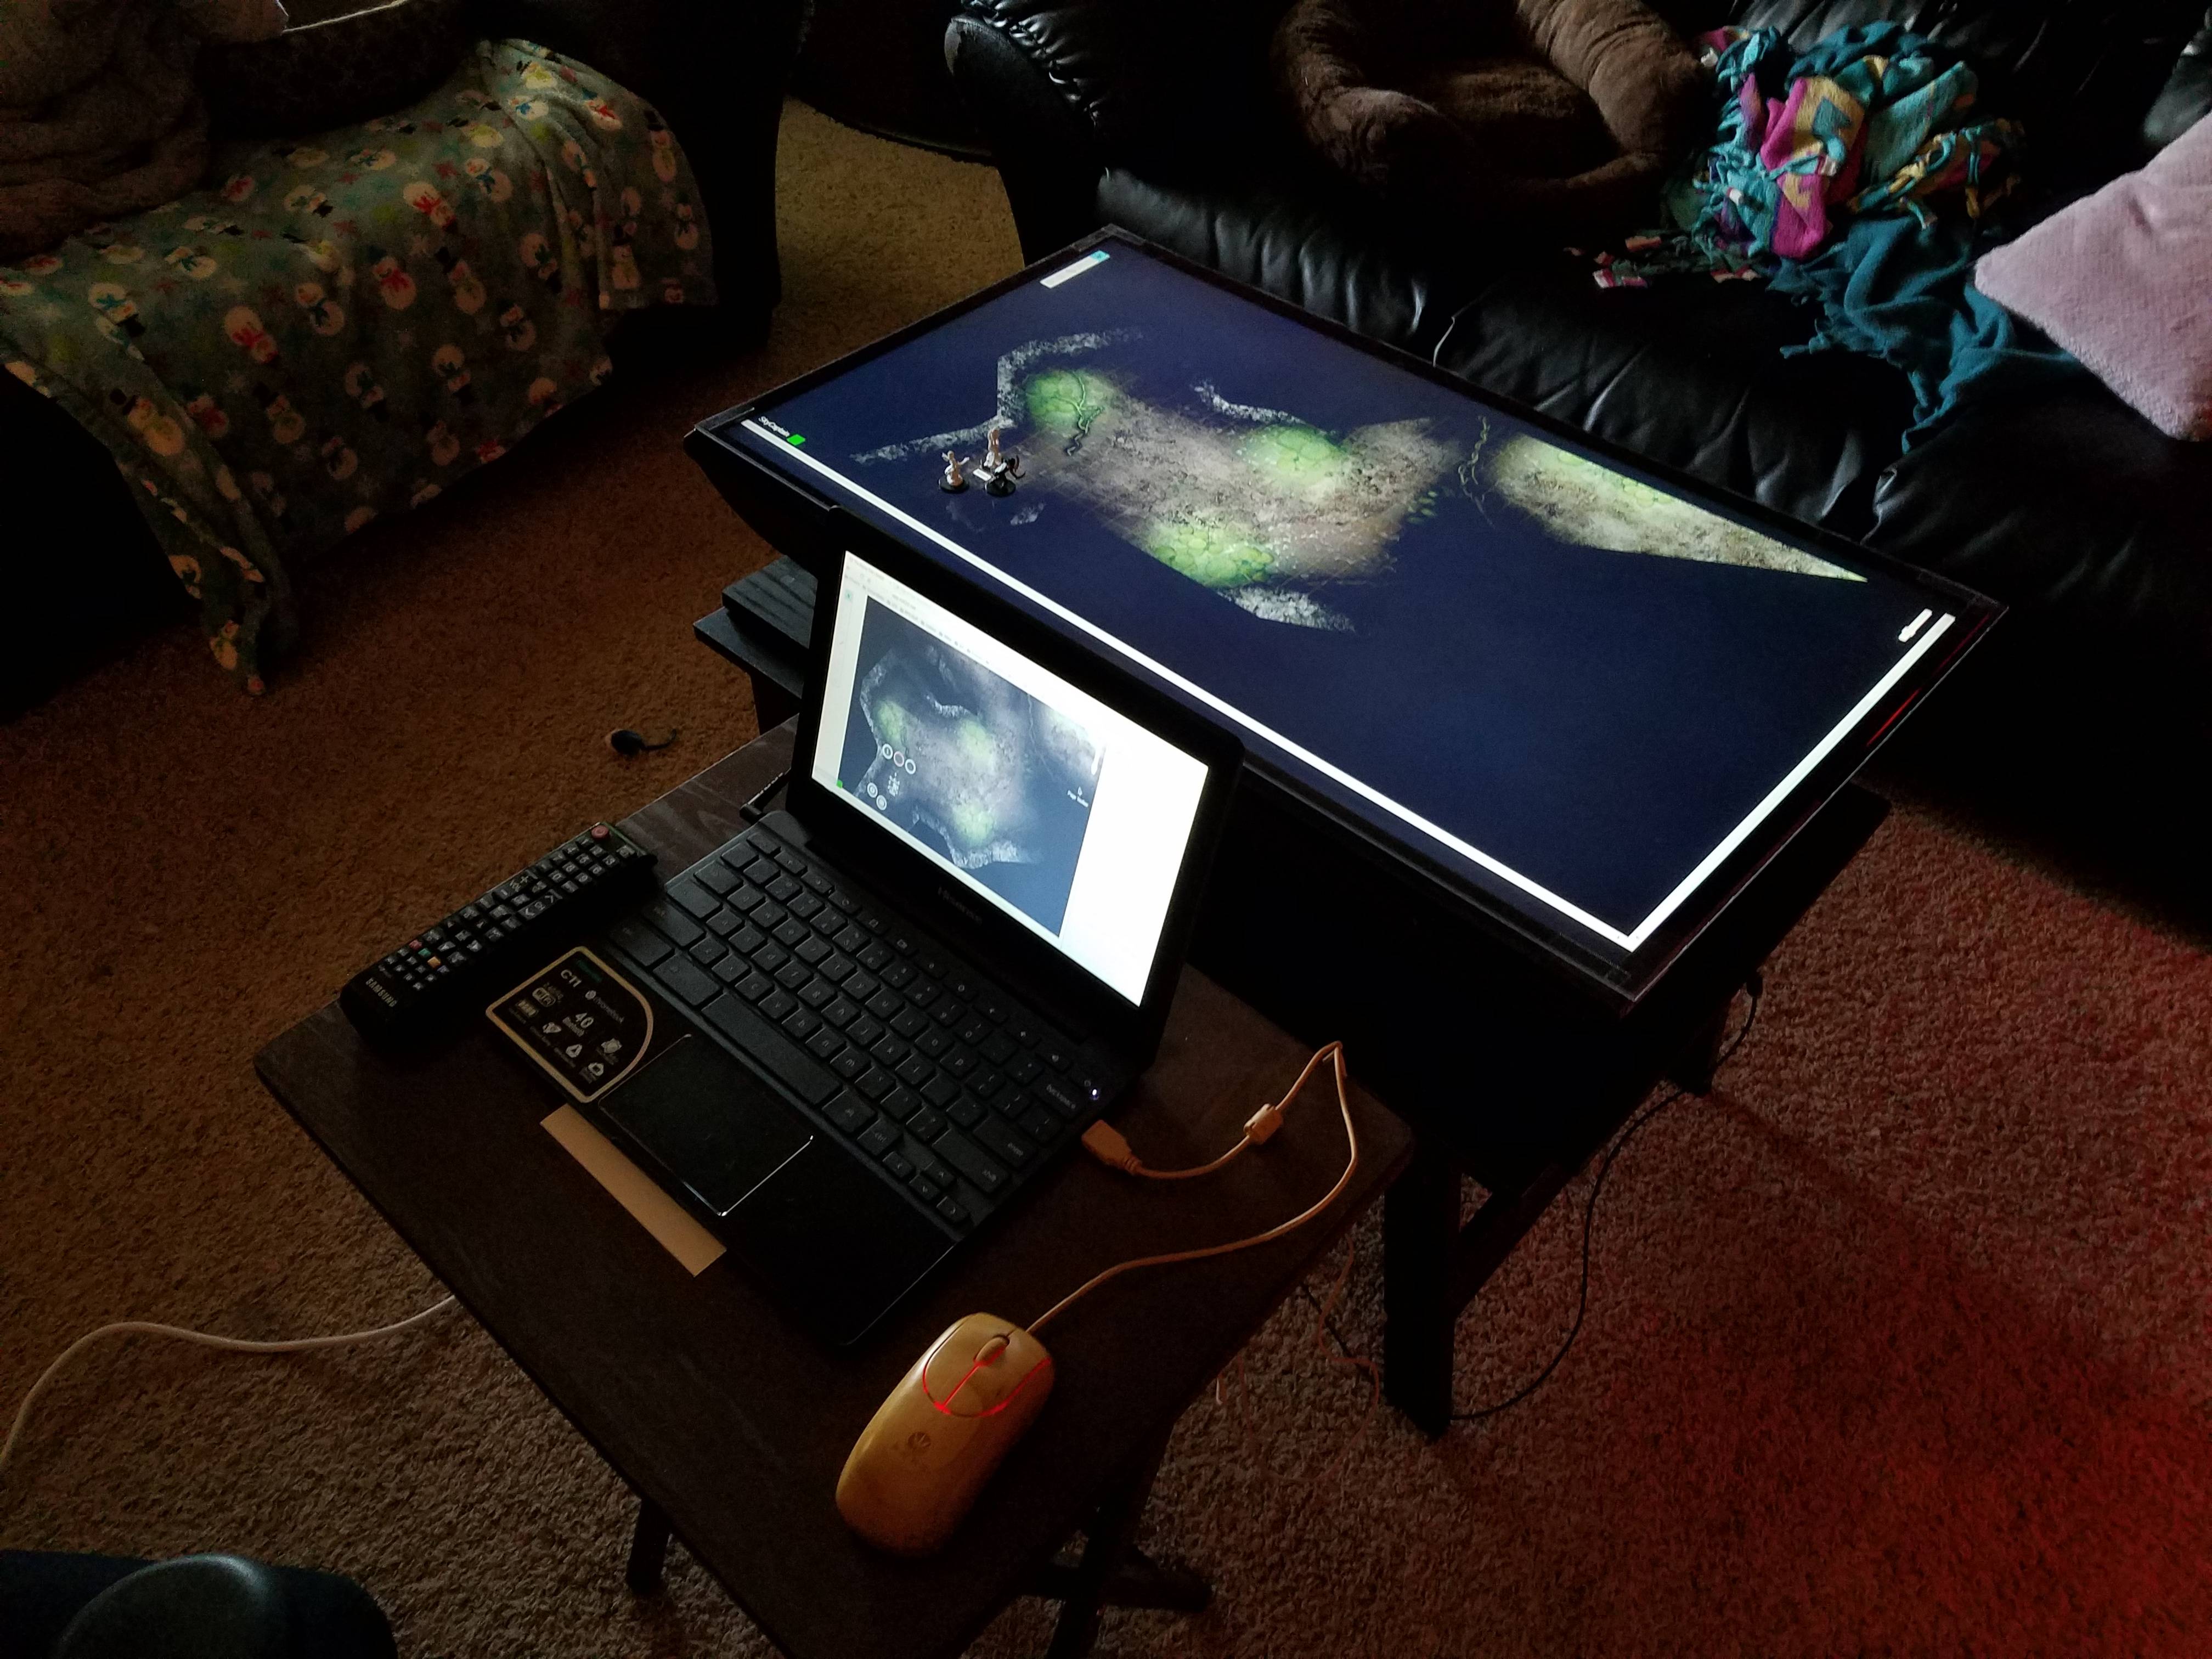
- Option 2: In addition to option 1, add a TV/Monitor to the player's computer. Connect to a 2nd viewing source using the appropriate cables, or connect wirelessly using Chromcast or similar device. You may want to include a wireless mouse and keyboard as well for convenience.
- Some people have even made gaming tables that include a TV/Monitor as the actual tabletop.
- Option 3: You can connect a TV/Monitor to the GM's computer and use a separate browser window/tab for the player account and send that view to the second screen. If the GM adds view/edit permissions to each player's character they can rejoin as player in a separate browser window without needing to create a dummy player account.
- B. Each player controls their own character.
- Option 1: Use multiple computers with each player logged in separately. Not much different than playing online, but you still get the face-to-face interaction.
- Option 2: Use a player's computer with or without an additional TV/Monitor, and install an API script (Pro Level)
- Face2Face Dynamic Lighting Helper authored by SkyCaptainVIII
- "The script will remove the controlledby setting on the character sheets specified in the script which will show vision only for the token at the top of the turn order. Unless it is an npc or other token or custom item."
- Observer v0.1.1 authored by The Aaron
- "I threw this together to allow GMs to designate a Player (probably an alternate account) to be an Observer. Observers are kept on the ControlledBy list for all characters that have something else on that list (PCs)."
Hide the UI
Bookmarklet
If you add a TV/Monitor to your game, you may want to hide the User Interface on the player's screen. You can create a bookmarklet (javascript used to temporarily alter a web page's appearance) to hide the UI.
- example;
- Create a bookmark in your browser and paste the code below into the URL field. To hide the Roll20 UI, simply click on the bookmark once the Roll20 editor has loaded. Refreshing the editor will restore the UI.
javascript:(function(){$("#zoomslider").css("display","none");$("#floatingtoolbar").css("display","none");$("#sidebarcontrol").css("display","none").click();$("#playerzone").css("display","none");$("#initiativewindow").parent().css("left","-10000px");$("#page-toolbar").css("display","none")})();
- Adjust the parameters as needed. For example you could remove elements from the bookmarklet code above for sections of the UI you may not want hidden.
User Style Manager
Alternatively, you could use a CSS-interpreting extension such as Stylus to selectively hide parts of the interface. Note that it does not hide the chat tab or the page menu, only removes the controls. This is to give greater flexibility. You can display or hide the chat bar normally before activating the style.
You can remove any of these you wish to keep by taking them out of the style definition:
#playerzone The avatars and player names
#zoomclick The zoom slider
#secondary-toolbar Token actions
#sidebarcontrol The sidebar tab handle
#page-toolbar .handle.showtip The page tab handle
.ui-dialog The turn tracker (and ALL dialog boxes)
#floatingtoolbar The left hand tool bar
#macrobar .player The bottom macro bar
Here is the style with all elements in place:
#playerzone, #zoomslider, #secondary-toolbar, #sidebarcontrol, #page-toolbar .handle.showtip, .ui-dialog, #floatingtoolbar, #macrobar .player {
display: none !important;
}
See Also
- Live Stream and Record Game Sessions
- Mobile
- Roll20 Table on Tablet Support
- Browser
- Community FAQ
- Dummy Account


