Layers
From Roll20 Wiki
Attention: Roll20 is no longer maintaining this document on the community wiki. For the most up-to-date information please visit this page on our Help Center for assistance: Here. For more information you can email us at Team@roll20.net
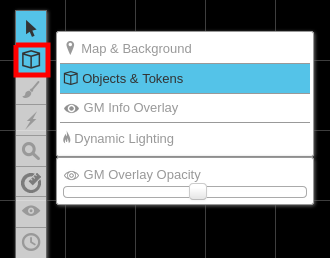
Roll20 organizes the graphics on the page into several layers. This makes it easier to work with just the set of graphics that you want, so for example you aren't moving the map around when you only mean to be interacting with the tokens on top of the map.
The Layers tool is found in the Toolbox, on the left side of the Interface.
Contents |
The Layers
- @ Map & Background Layer is intended for objects that will remain static throughout the game, such as the background map or pieces of furniture/decorations.
- b Objects/Tokens Layer is intended for tokens that you and the players will be manipulating throughout the game. Objects on this layer have a special radial menu to allow you to quickly change their properties, and also show bars and status markers.
- E GM Info Layer can only be seen by the GM. It's a great place to put drawings or text to remind you of traps or other information about the map that only the GM should see. You can also move tokens to this layer to hide them from players.
| This is about a Roll20 feature exclusive to Plus & Pro-subscribers, or to players in a Game created by a Plus/Pro-subscriber. If you'd like to use this feature, consider upgrading your account. |
- r Dynamic Lighting Layer is used for laying down lines and shapes that will serve as walls and/or obstacles that will block out light or line of sight. Read more about Dynamic Lighting or Advanced Fog of War.
Changing Layers
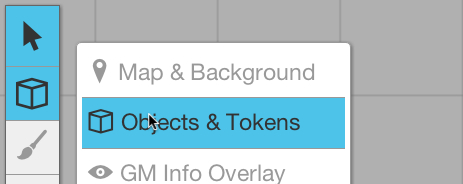
To change between the available layers, just mouseover the Layers button on the Toolbox. You'll see the three available layers, click to switch to a new layer.
You can also use the keyboard shortcuts:
- CTRL+M (CMD+M on Mac): Switch to the @ Maps layer
- CTRL+O (CMD+O on Mac): Switch to the b Object/Tokens layer
- CTRL+K (CMD+K on Mac): Switch to the E GM Info layer
- CTRL+, (?CMD+, on Mac?): Switch to the r Dynamic Lighting layer
Moving Objects Between Layers
By default, when you create an object (such as by dragging and dropping a token image or a map onto the tabletop), it's placed on whatever the currently active layer is. Sometimes you may want to move objects between layers, though. To do so, you can right-click on the object, and from the Layers option in the menu that appears, select the new layer to which you would like to move the object.
You can also use the keyboard shortcuts:
- CTRL+SHFT+M (CMD+SHIFT+M on Mac): Switch to the @ Maps layer AND move any selected objects to that layer
- CTRL+SHFT+O (CMD+SHIFT+O on Mac): Switch to the b Objects/Tokens layer AND move any selected objects to that layer
- CTRL+SHFT+K (CMD+SHIFT+K on Mac): Switch to the E GM Info layer AND move any selected objects to that layer
- CTRL+SHFT+, (CMD+SHIFT+, on Mac): Switch to the r Dynamic Lighting layer AND move any selected objects to that layer (??)
A common use case of this is to move tokens from the E GM Info layer (where they are not visible to players) to the b Objects layer (where they are) when you want to "reveal" enemies to the players in a surprise attack.
Toolbox
- w Select and Pan Tool
- b Layers
- c Drawing Tools
- e FX Tool
- s Zoom Tool
-
 Ruler Tool
- E Fog of War
- t Turn Tracker
- t Dice Rolling GUI
- ? Help Tool


